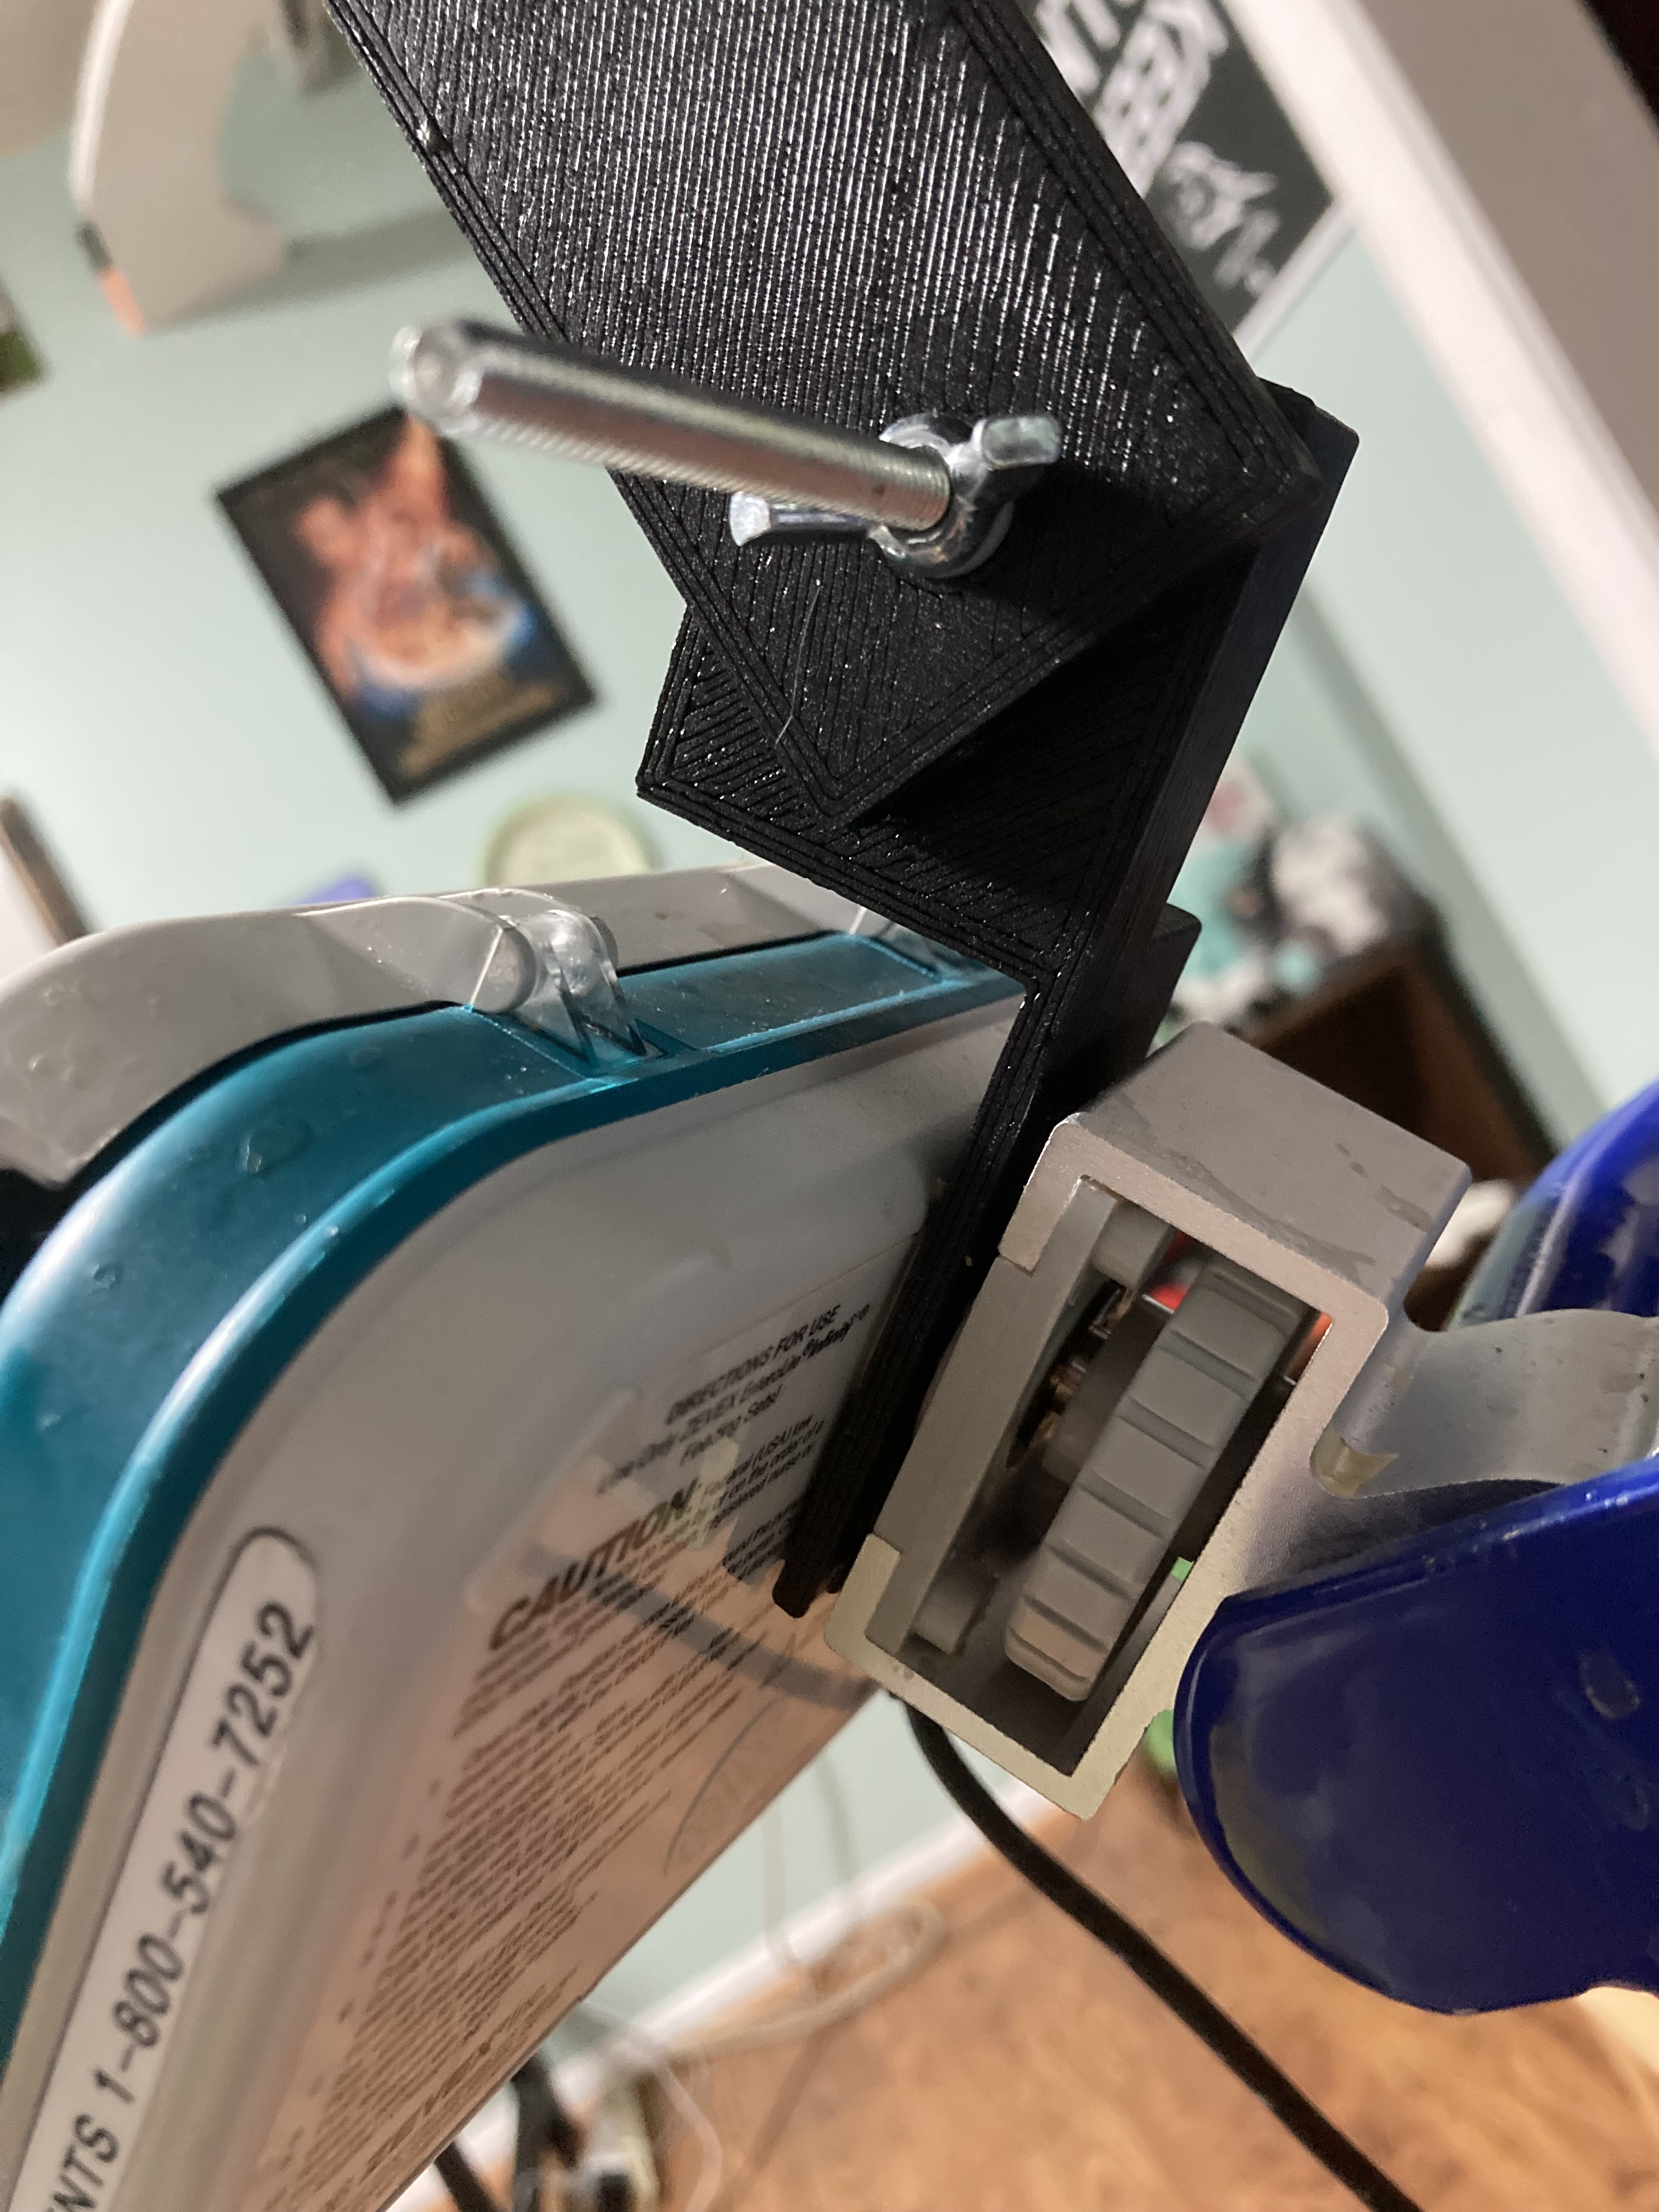
This is a 3D printed pull to help grab the joystick. It attaches to the underside of the joystick using the already existing bolts.
You can get the design for this at Thingiverse. https://www.thingiverse.com/thing:6375243

14 Thursday Dec 2023
Posted in Uncategorized
This is a 3D printed pull to help grab the joystick. It attaches to the underside of the joystick using the already existing bolts.
You can get the design for this at Thingiverse. https://www.thingiverse.com/thing:6375243
23 Thursday Mar 2023
Posted in Uncategorized
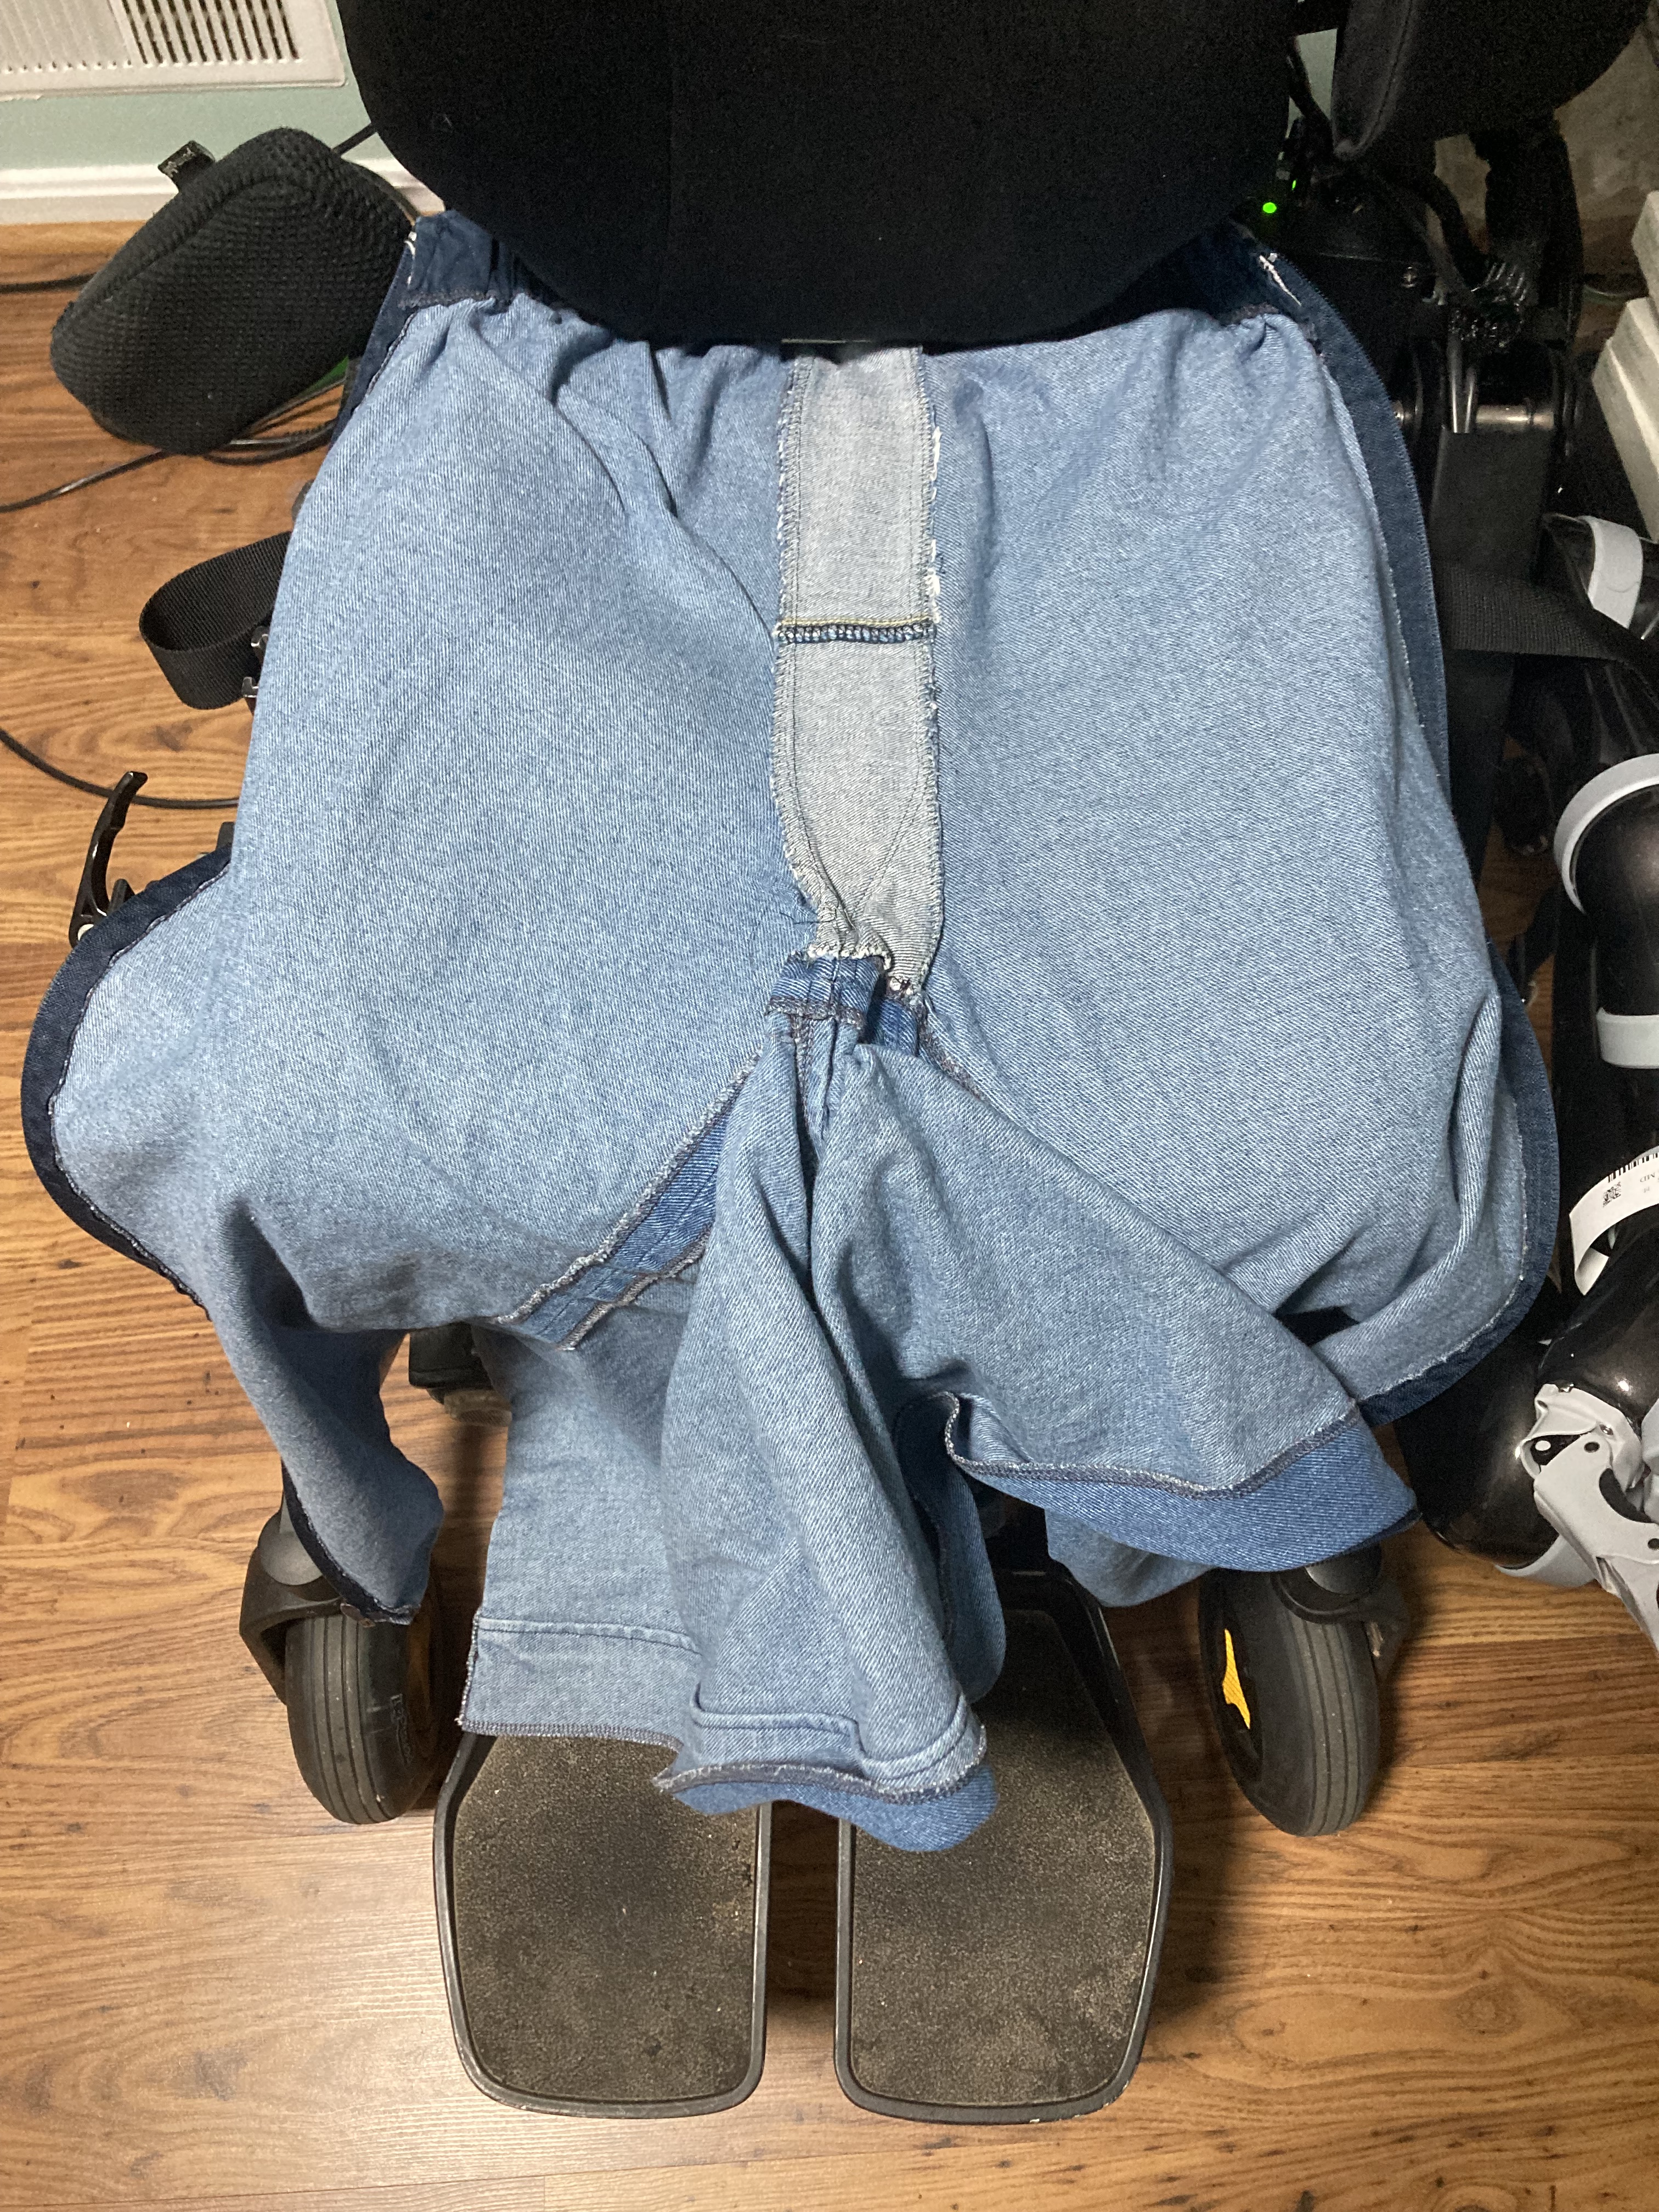
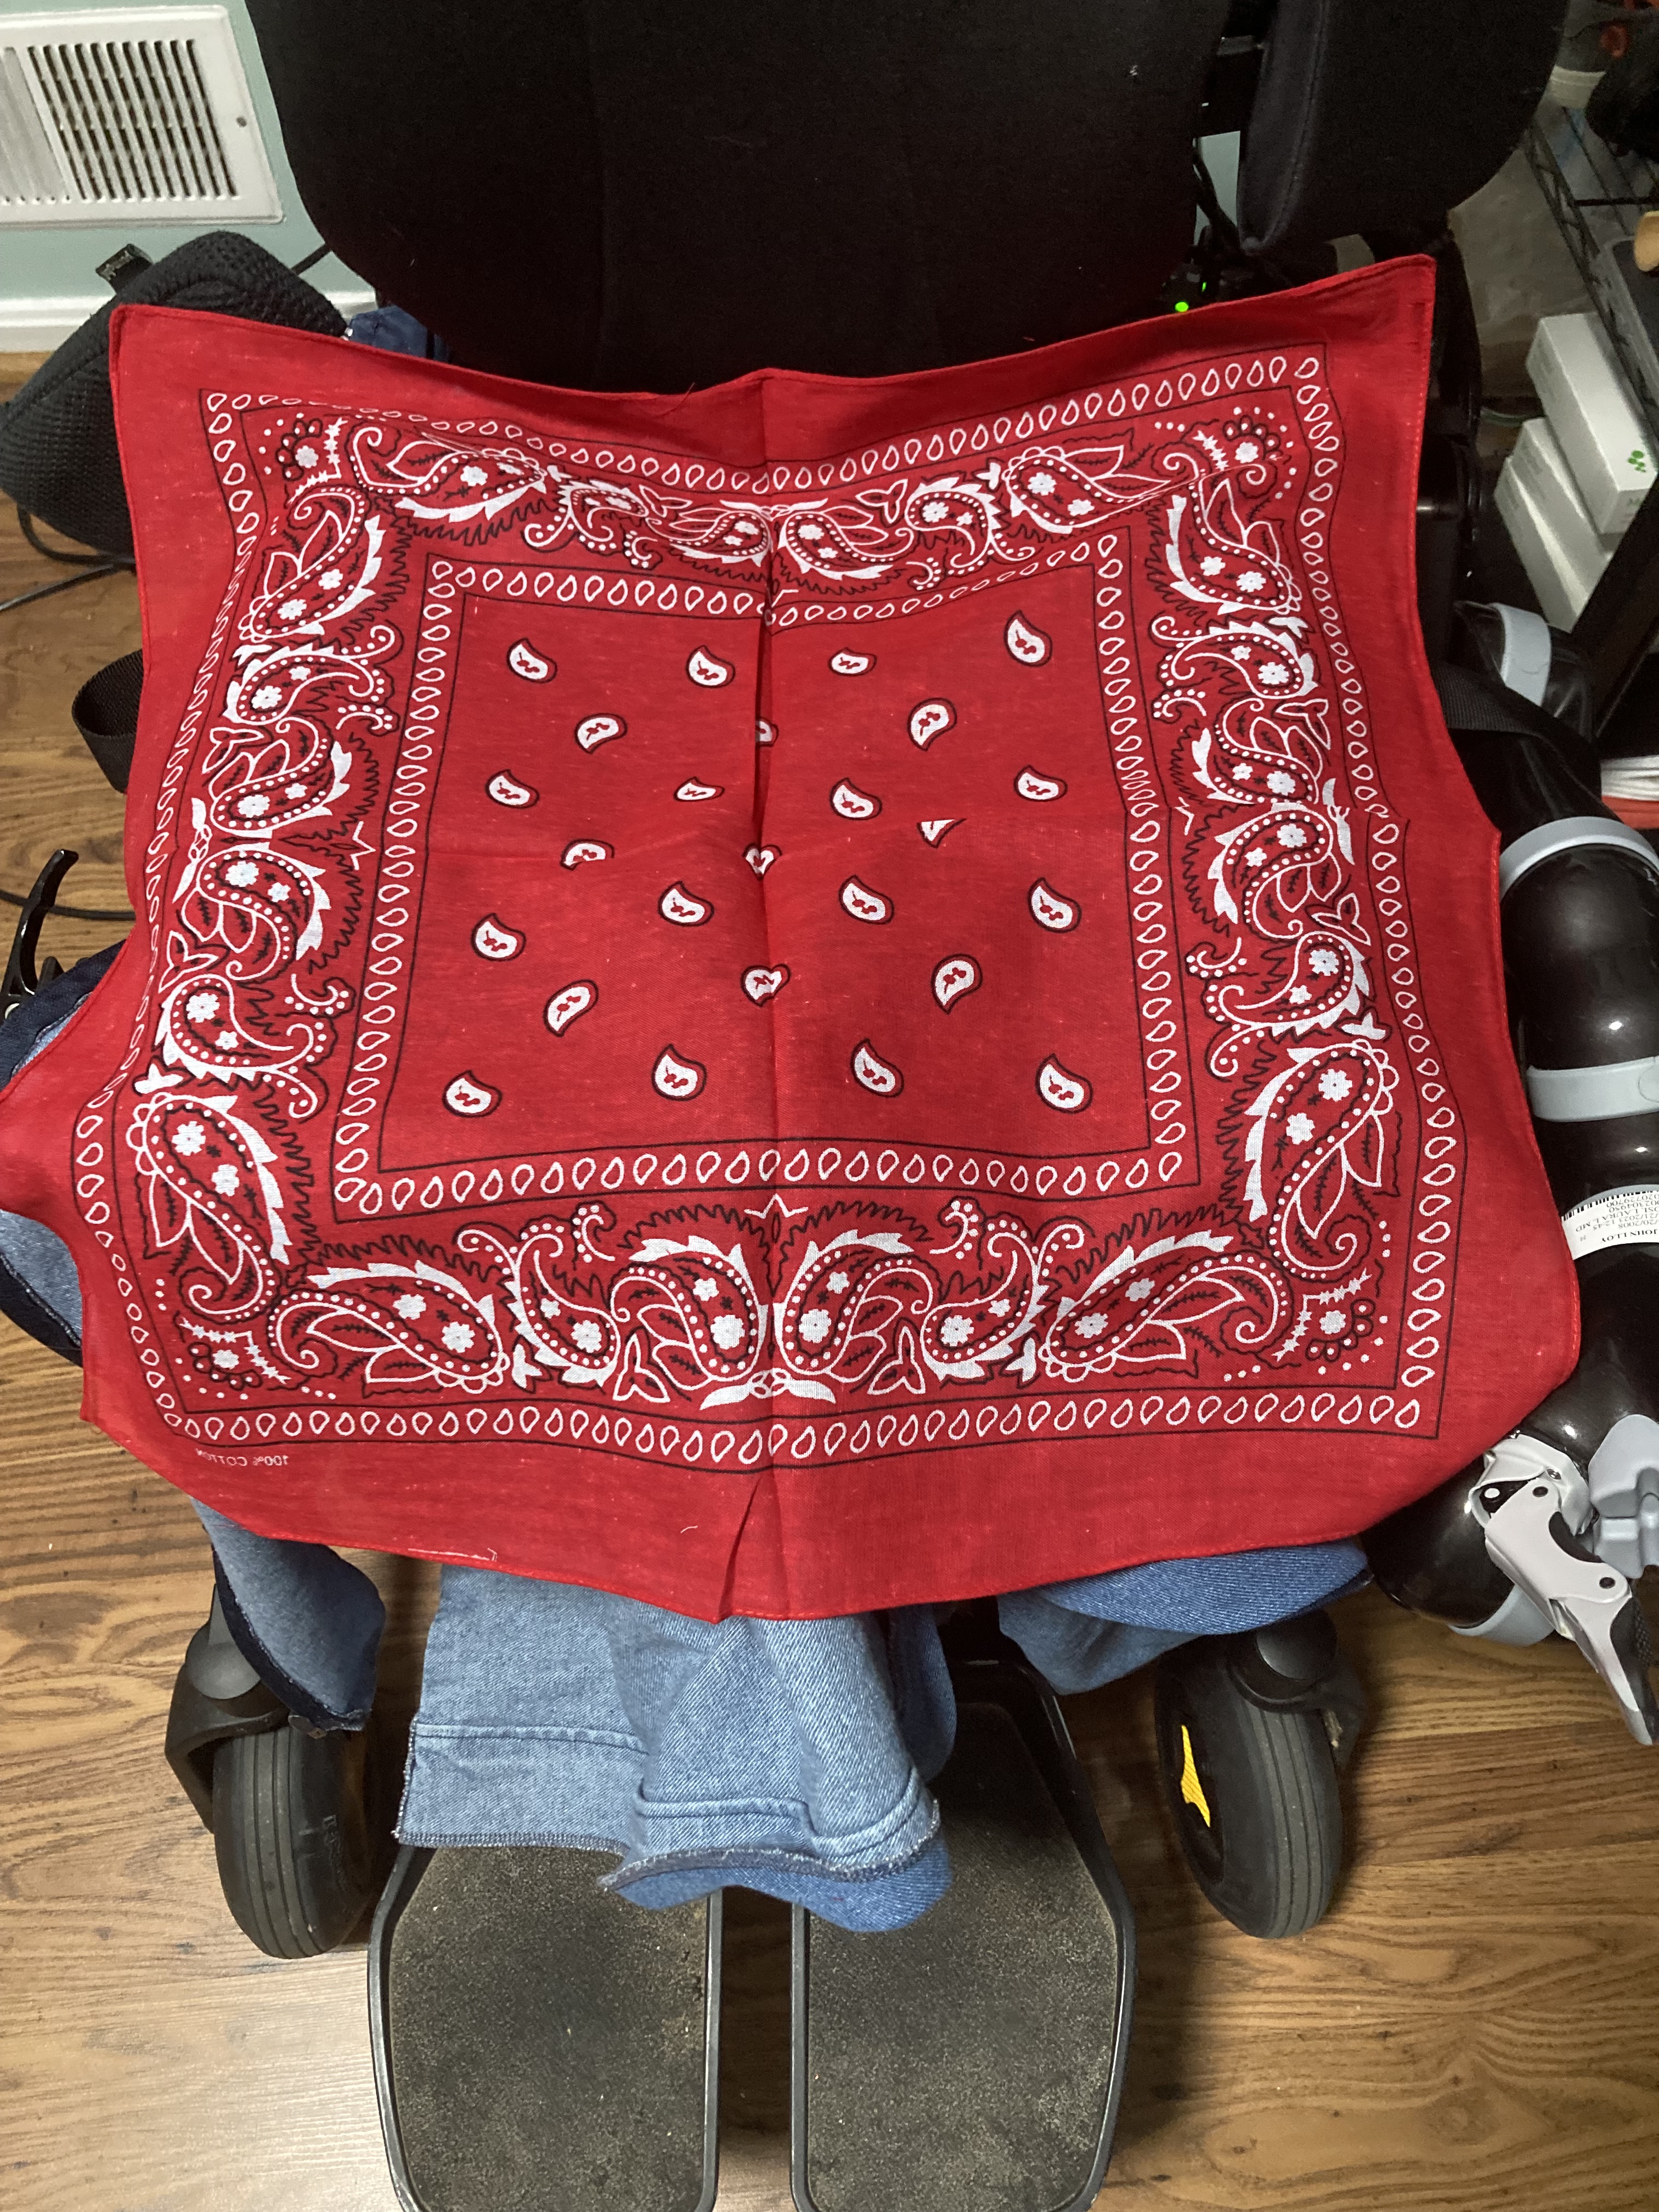
Quick demo to show how to put on the zipper pants.


19 Sunday Feb 2023
Posted in Uncategorized
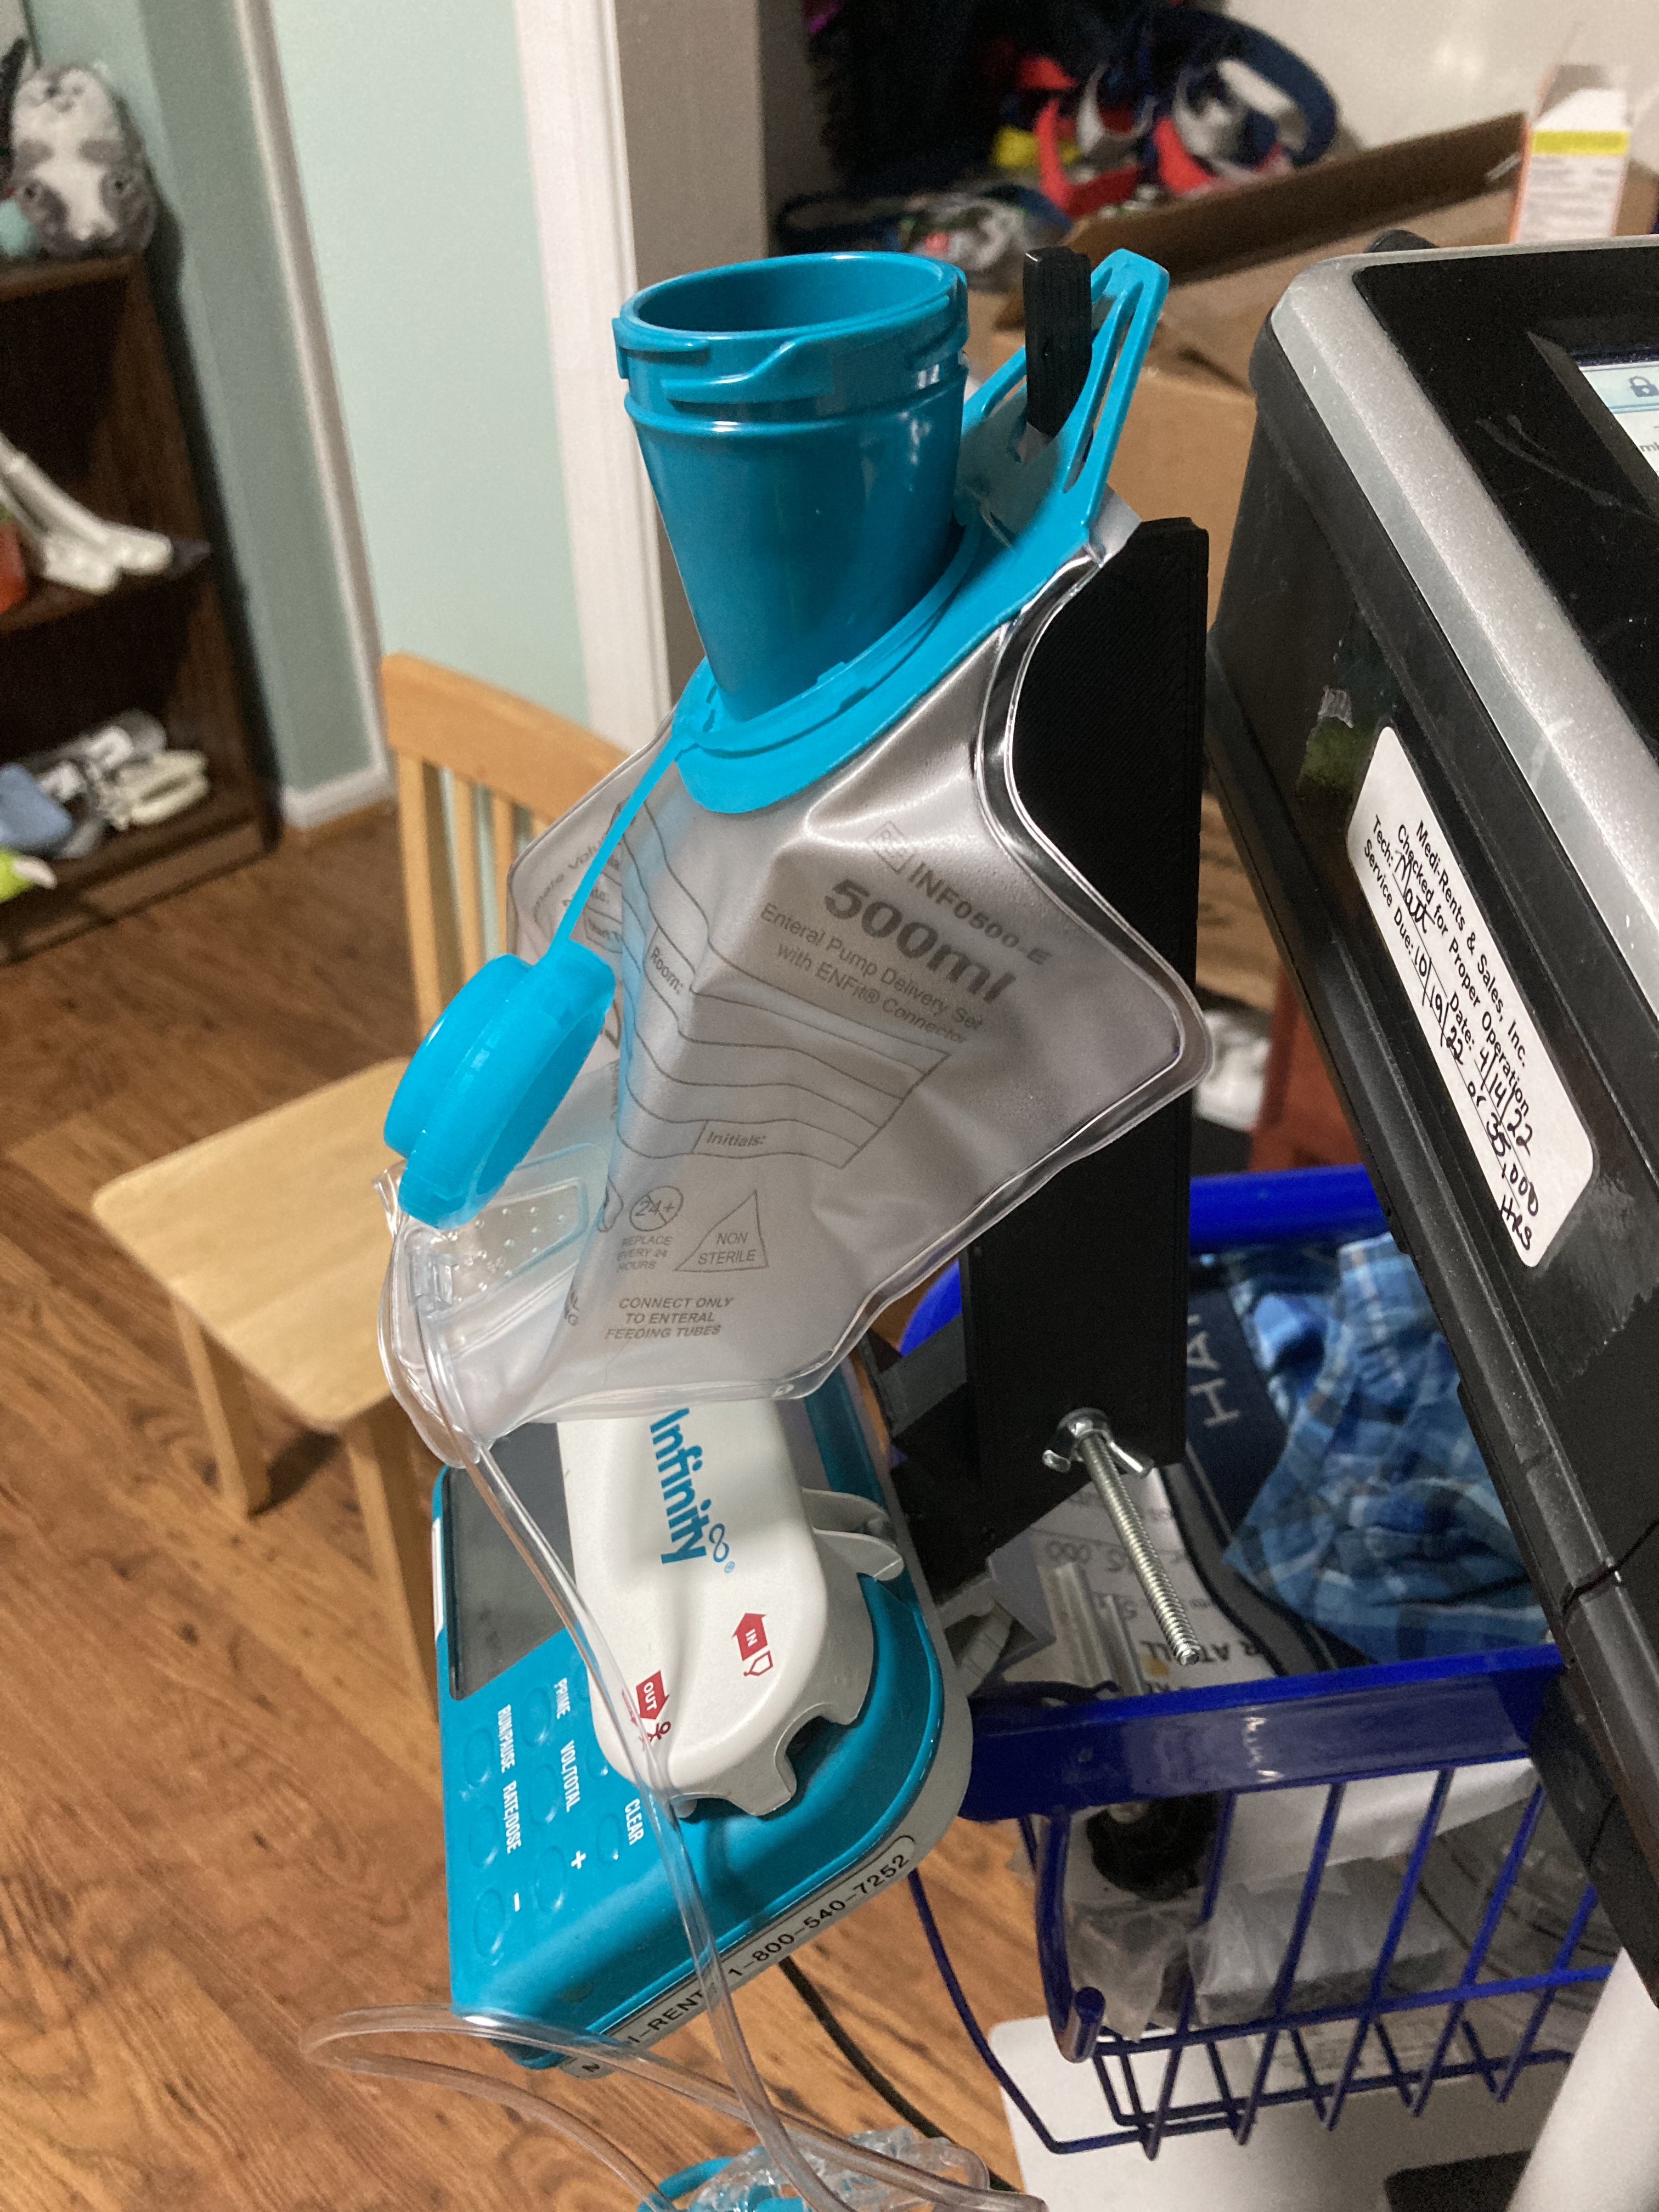
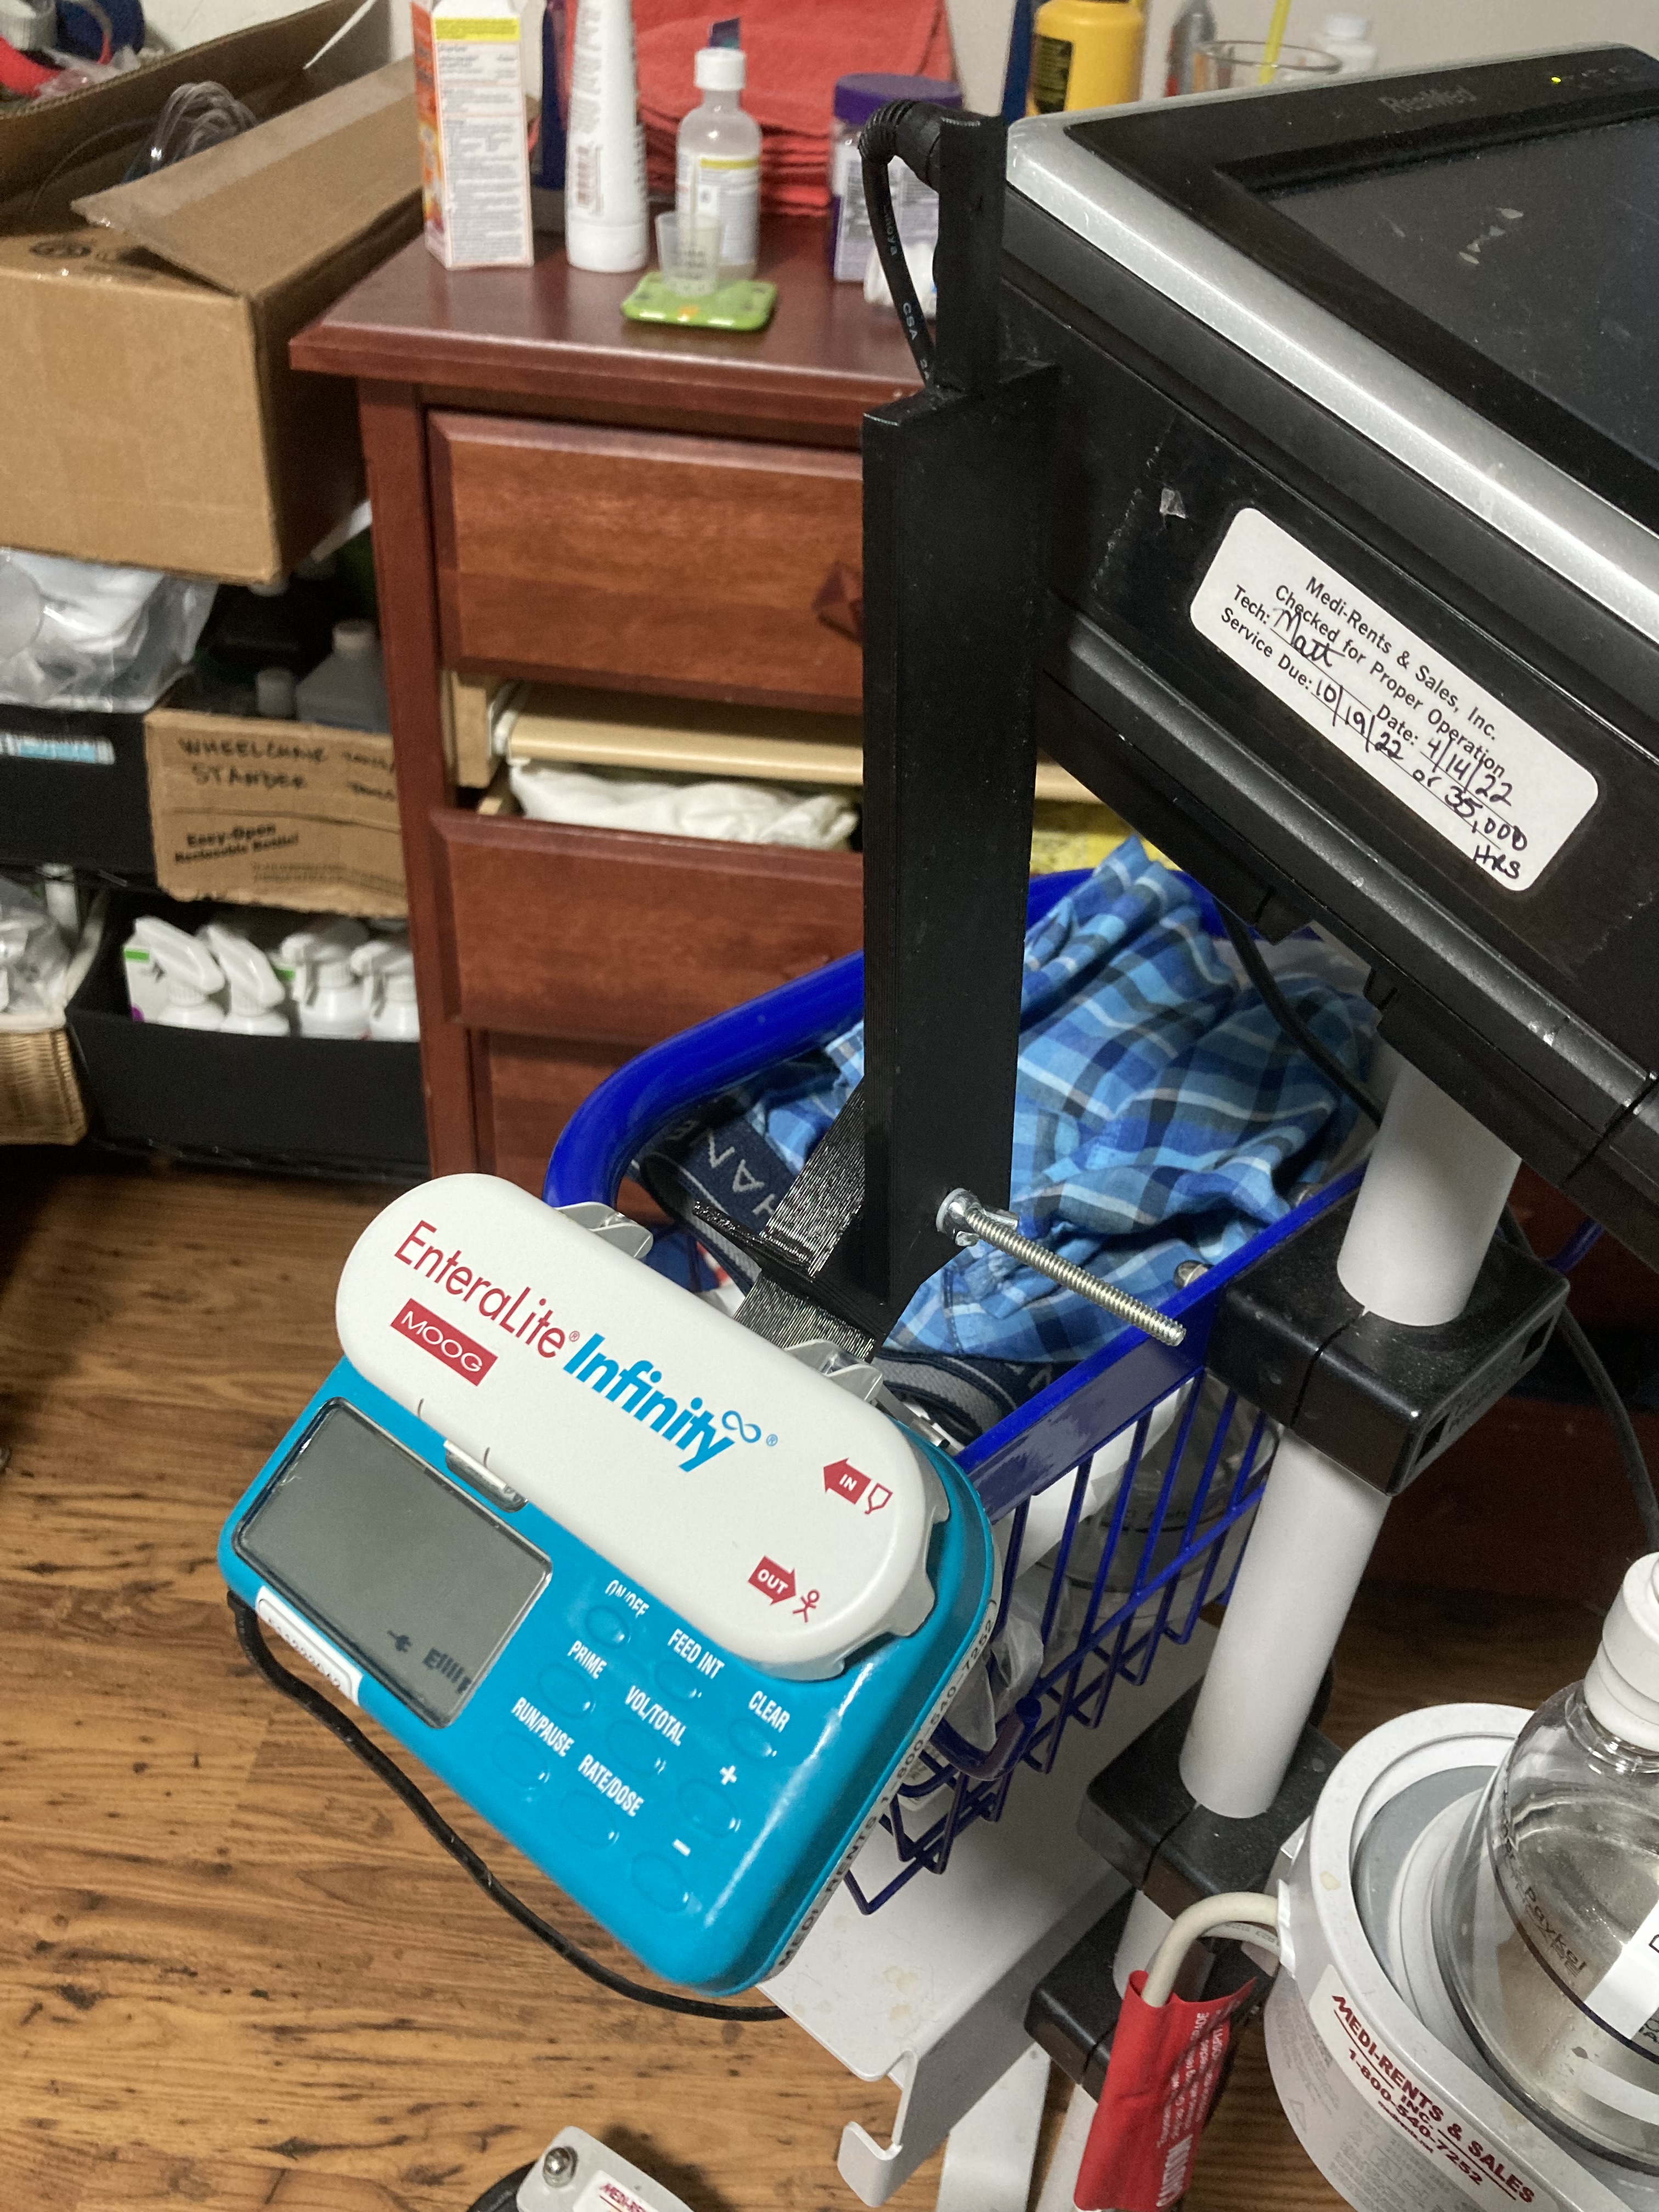
Here’s an example of the kind of things I 3D print. We don’t have a specific feeding machine stand, so we never had a good place to hang the feeding bag, so here was my thought process as I came up for a design to print…
Below is the finished product. There are two pieces. The bottom piece is bolted directly into the feeding machine. (The feeding machine already allows you to screw in a clamp and this is where I have my base piece screw into, too). This means that it is portable. Wherever we take the feeding machine – the feeding bag hanger goes with it.
The upper piece bolts into the bottom piece – and I used a wing nut so that you can tighten or loosen the connection in order to get the angle of the hanger where you need it.
Below is a better view showing how my 3D printed piece squeezes between the clamp that comes with the machine, and the machine itself. It had to be printed thin enough so that the clamp bolt was still able to screw into the back of the machine.
Note that this design works well enough – but if I wanted perfection, I would have re-done it. Note in the above picture that when you open the front of the feeding machine – it will only open so far. It opens far enough, but just barely. If I re-printed it, I would leave more room for opening it. I’d also probably play with the connection where the wing nut is – so that maybe the stand clicked and held without having to tighten the wingnut so tight. But this is being picky.
I used TinkerCAD to design the bracket. The bracket was saved in two STL files. See the image below.

I used IdeaMaker to generate GCode from the STL files for my JGMaker 3D Printer and bada-bing bada-boom I now have a place to hang the feeding bag.
24 Sunday Jul 2022
Posted in Uncategorized
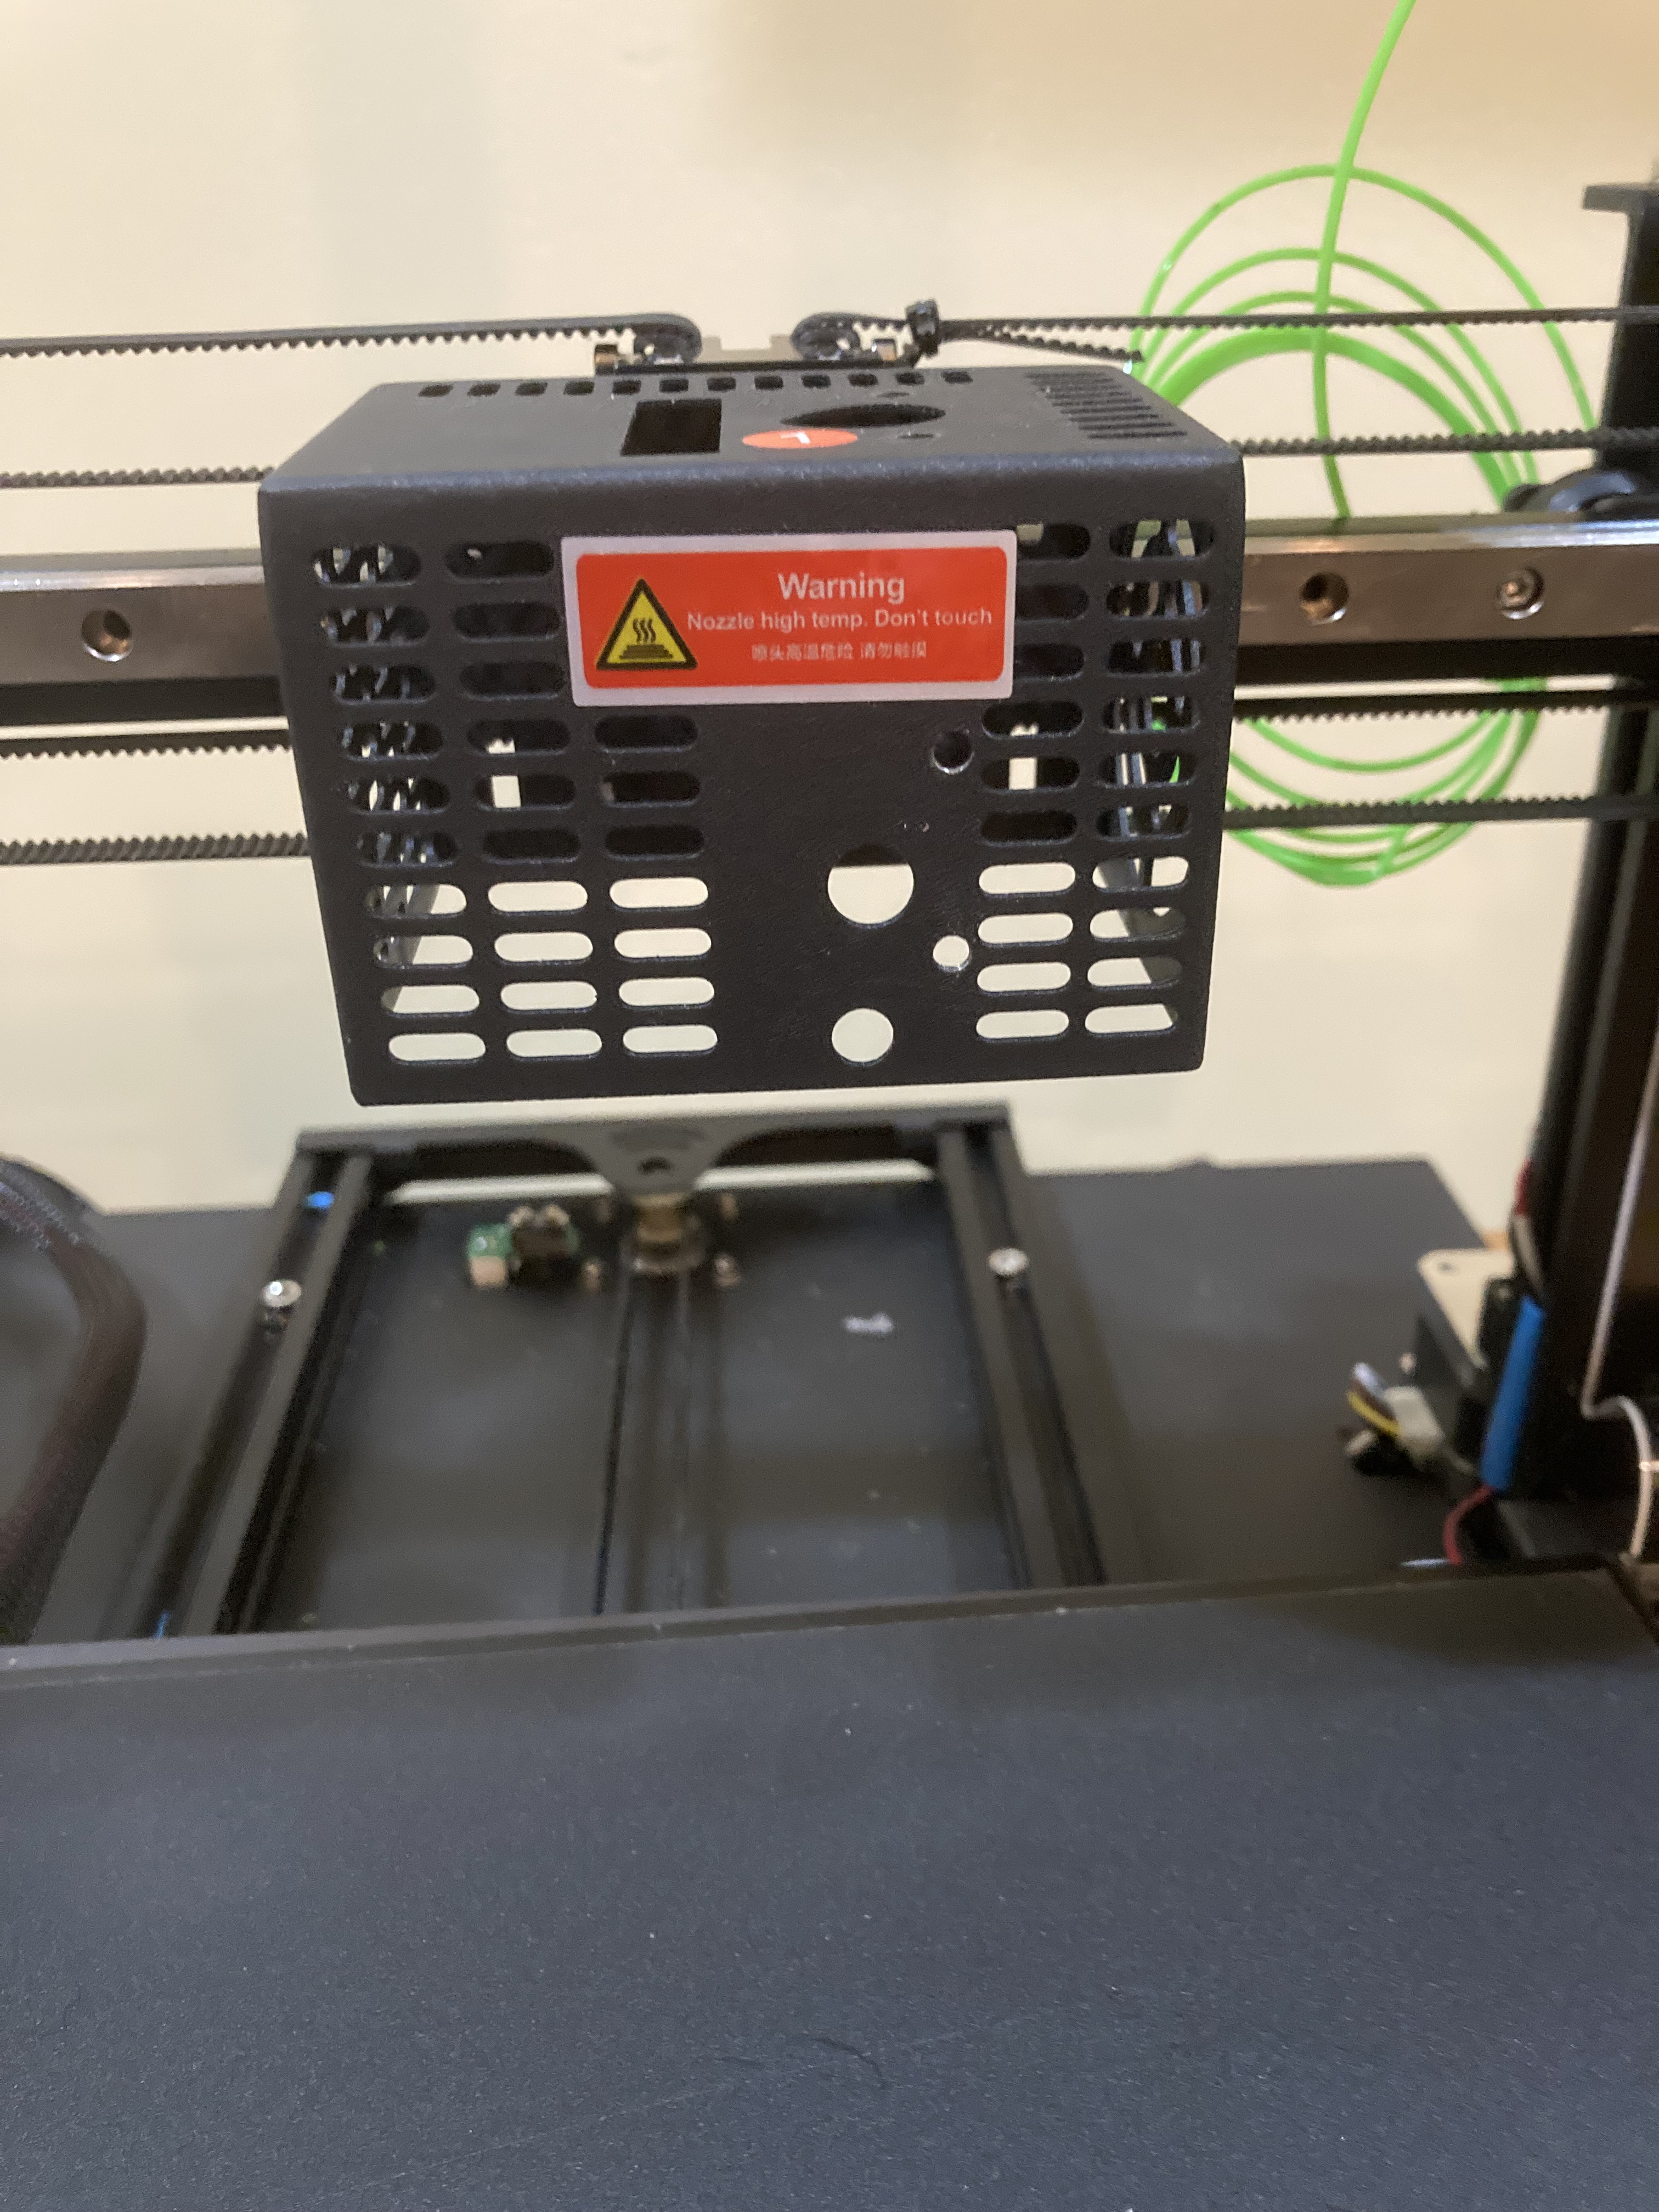
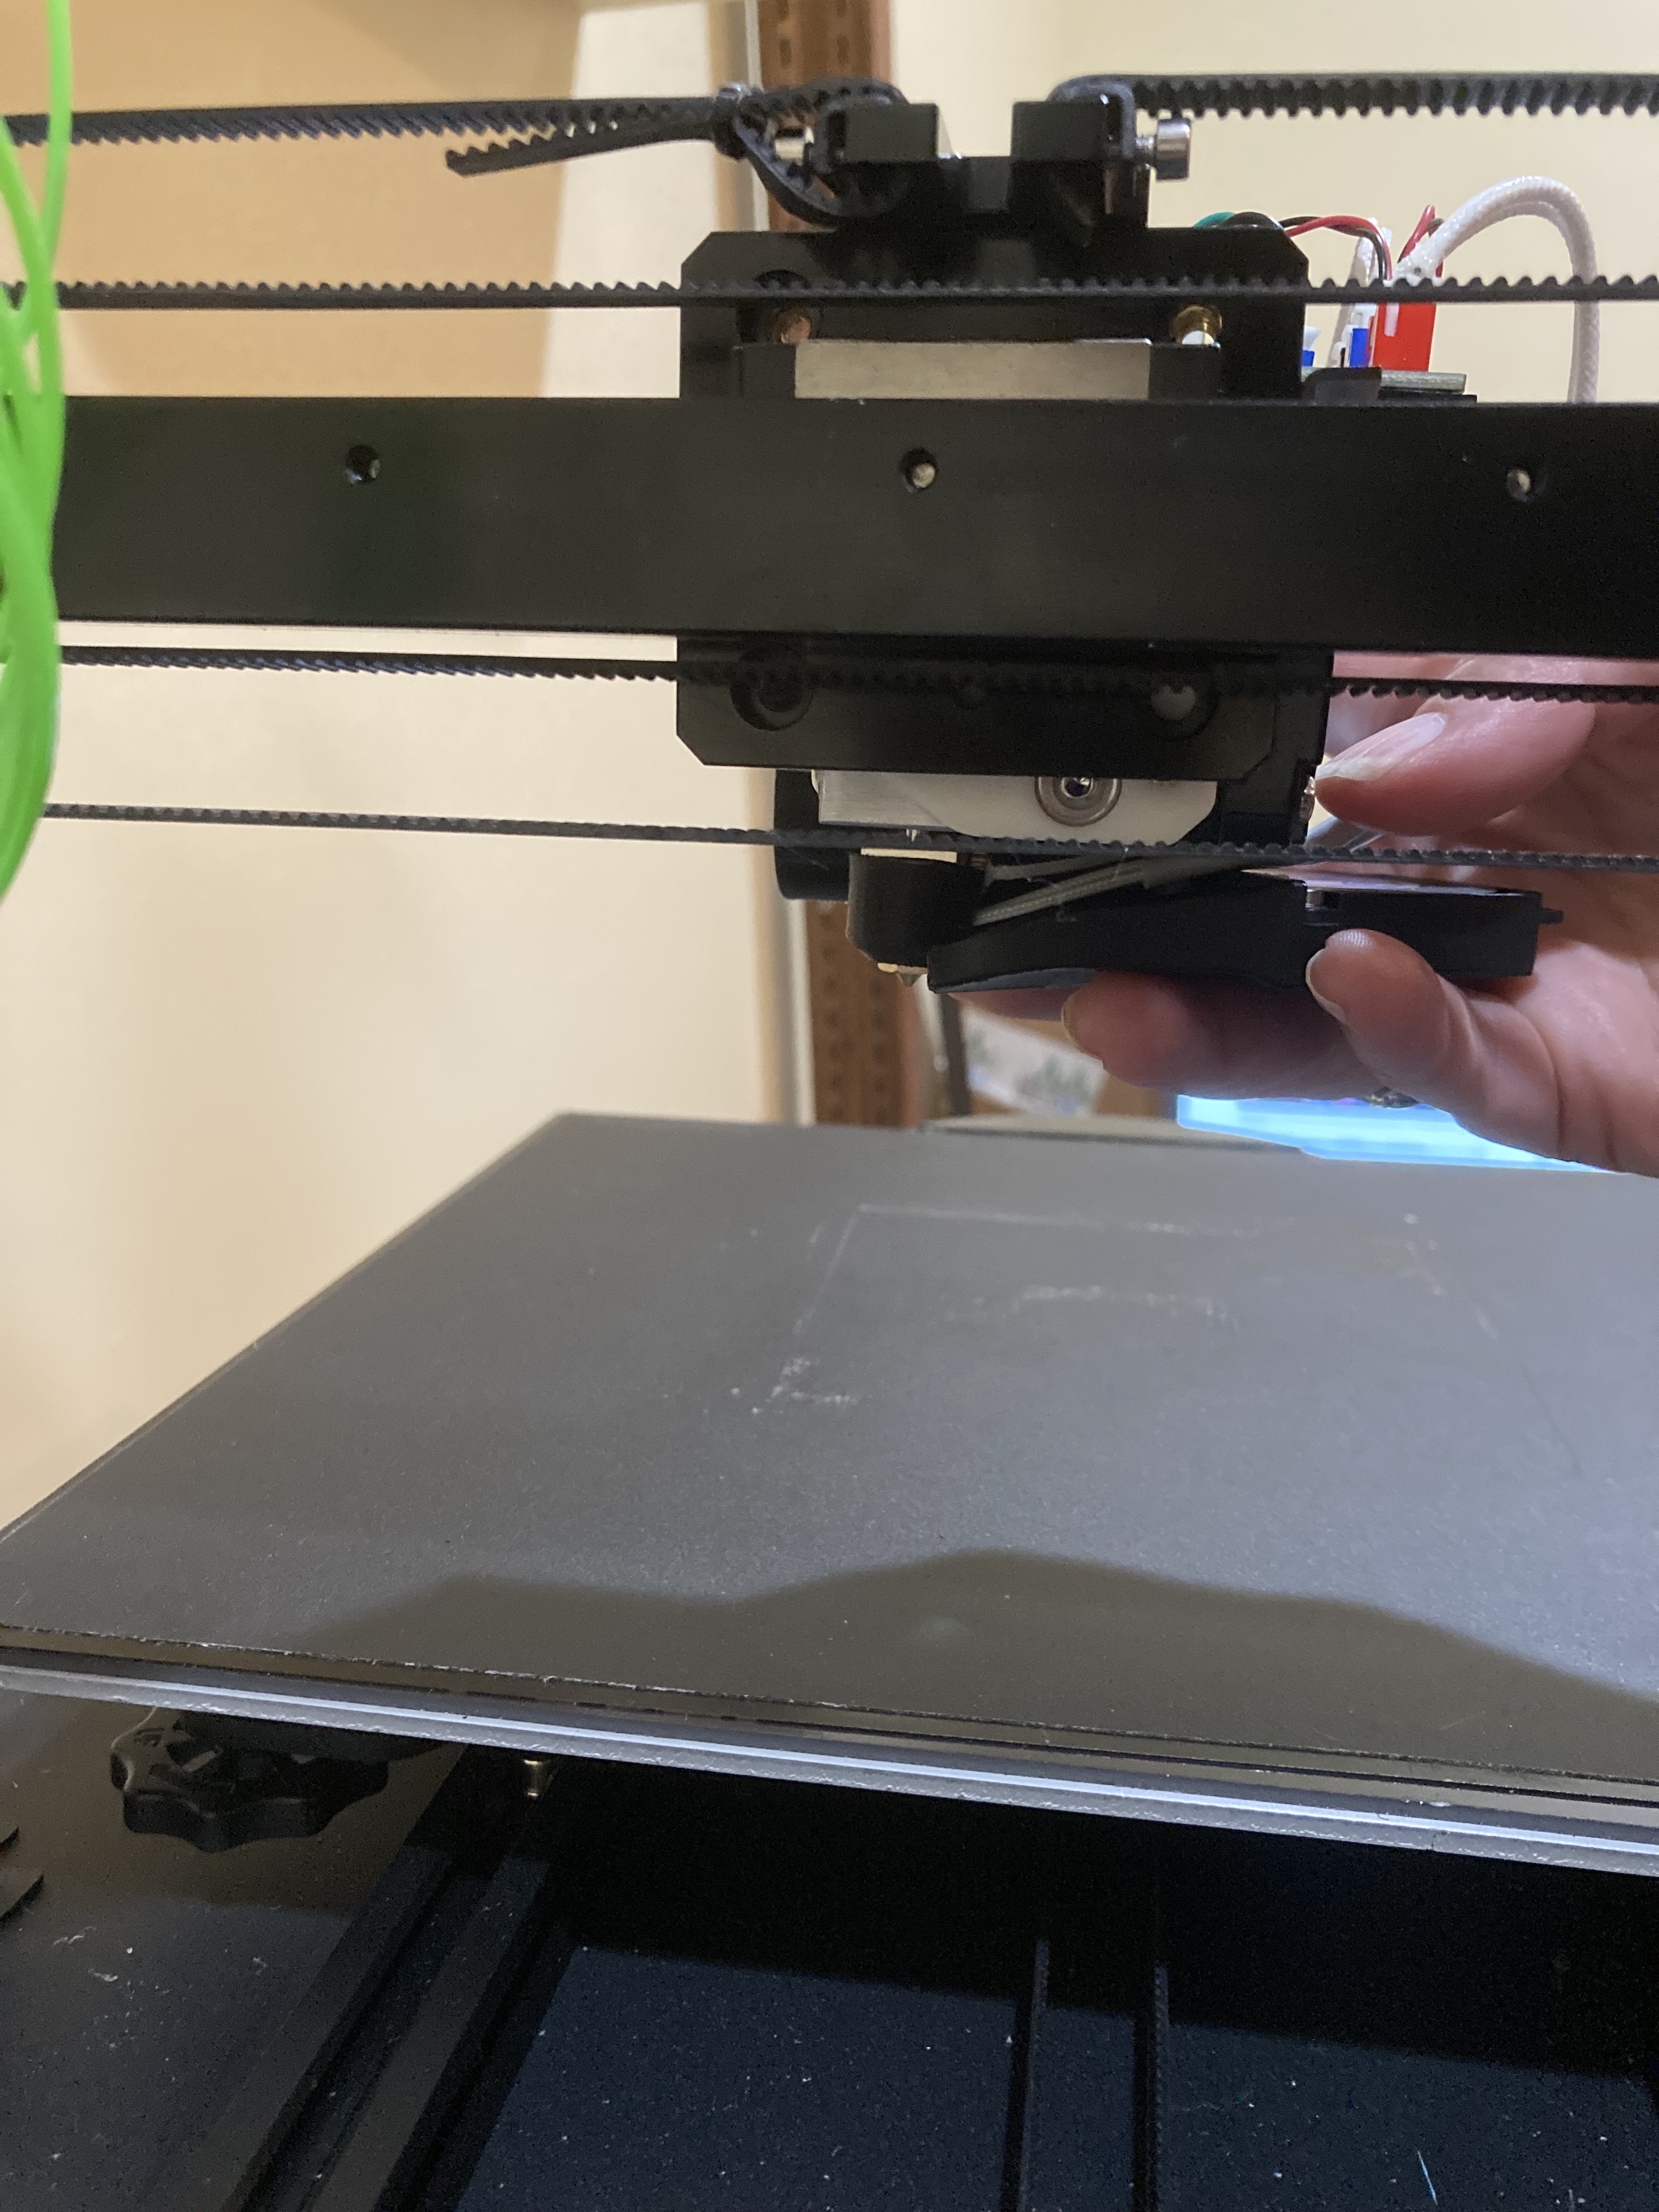
So, I’ve been using a 3D printer to print out lots of different things for John. It’s a JG Artist-D Pro. Unfortunately, it’s required a bit of fiddling (I was hoping for fiddle free). Recently the extruder was under extruding so badly that it wasn’t even printing. So, I got a new extruder.
And these are the steps to replace the JG Artist-D extruder.
Steps:
Follow this video to open the case: https://www.youtube.com/watch?v=Kw4A6BgIjHU
Note that the case is glued down, so you have to use a good amount of force to peel it open. I bent mine a little and it took a little effort to line up the screw holes to put it back together.
Now, locate the stepper drivers and the potentiometers (see arrows and circle).
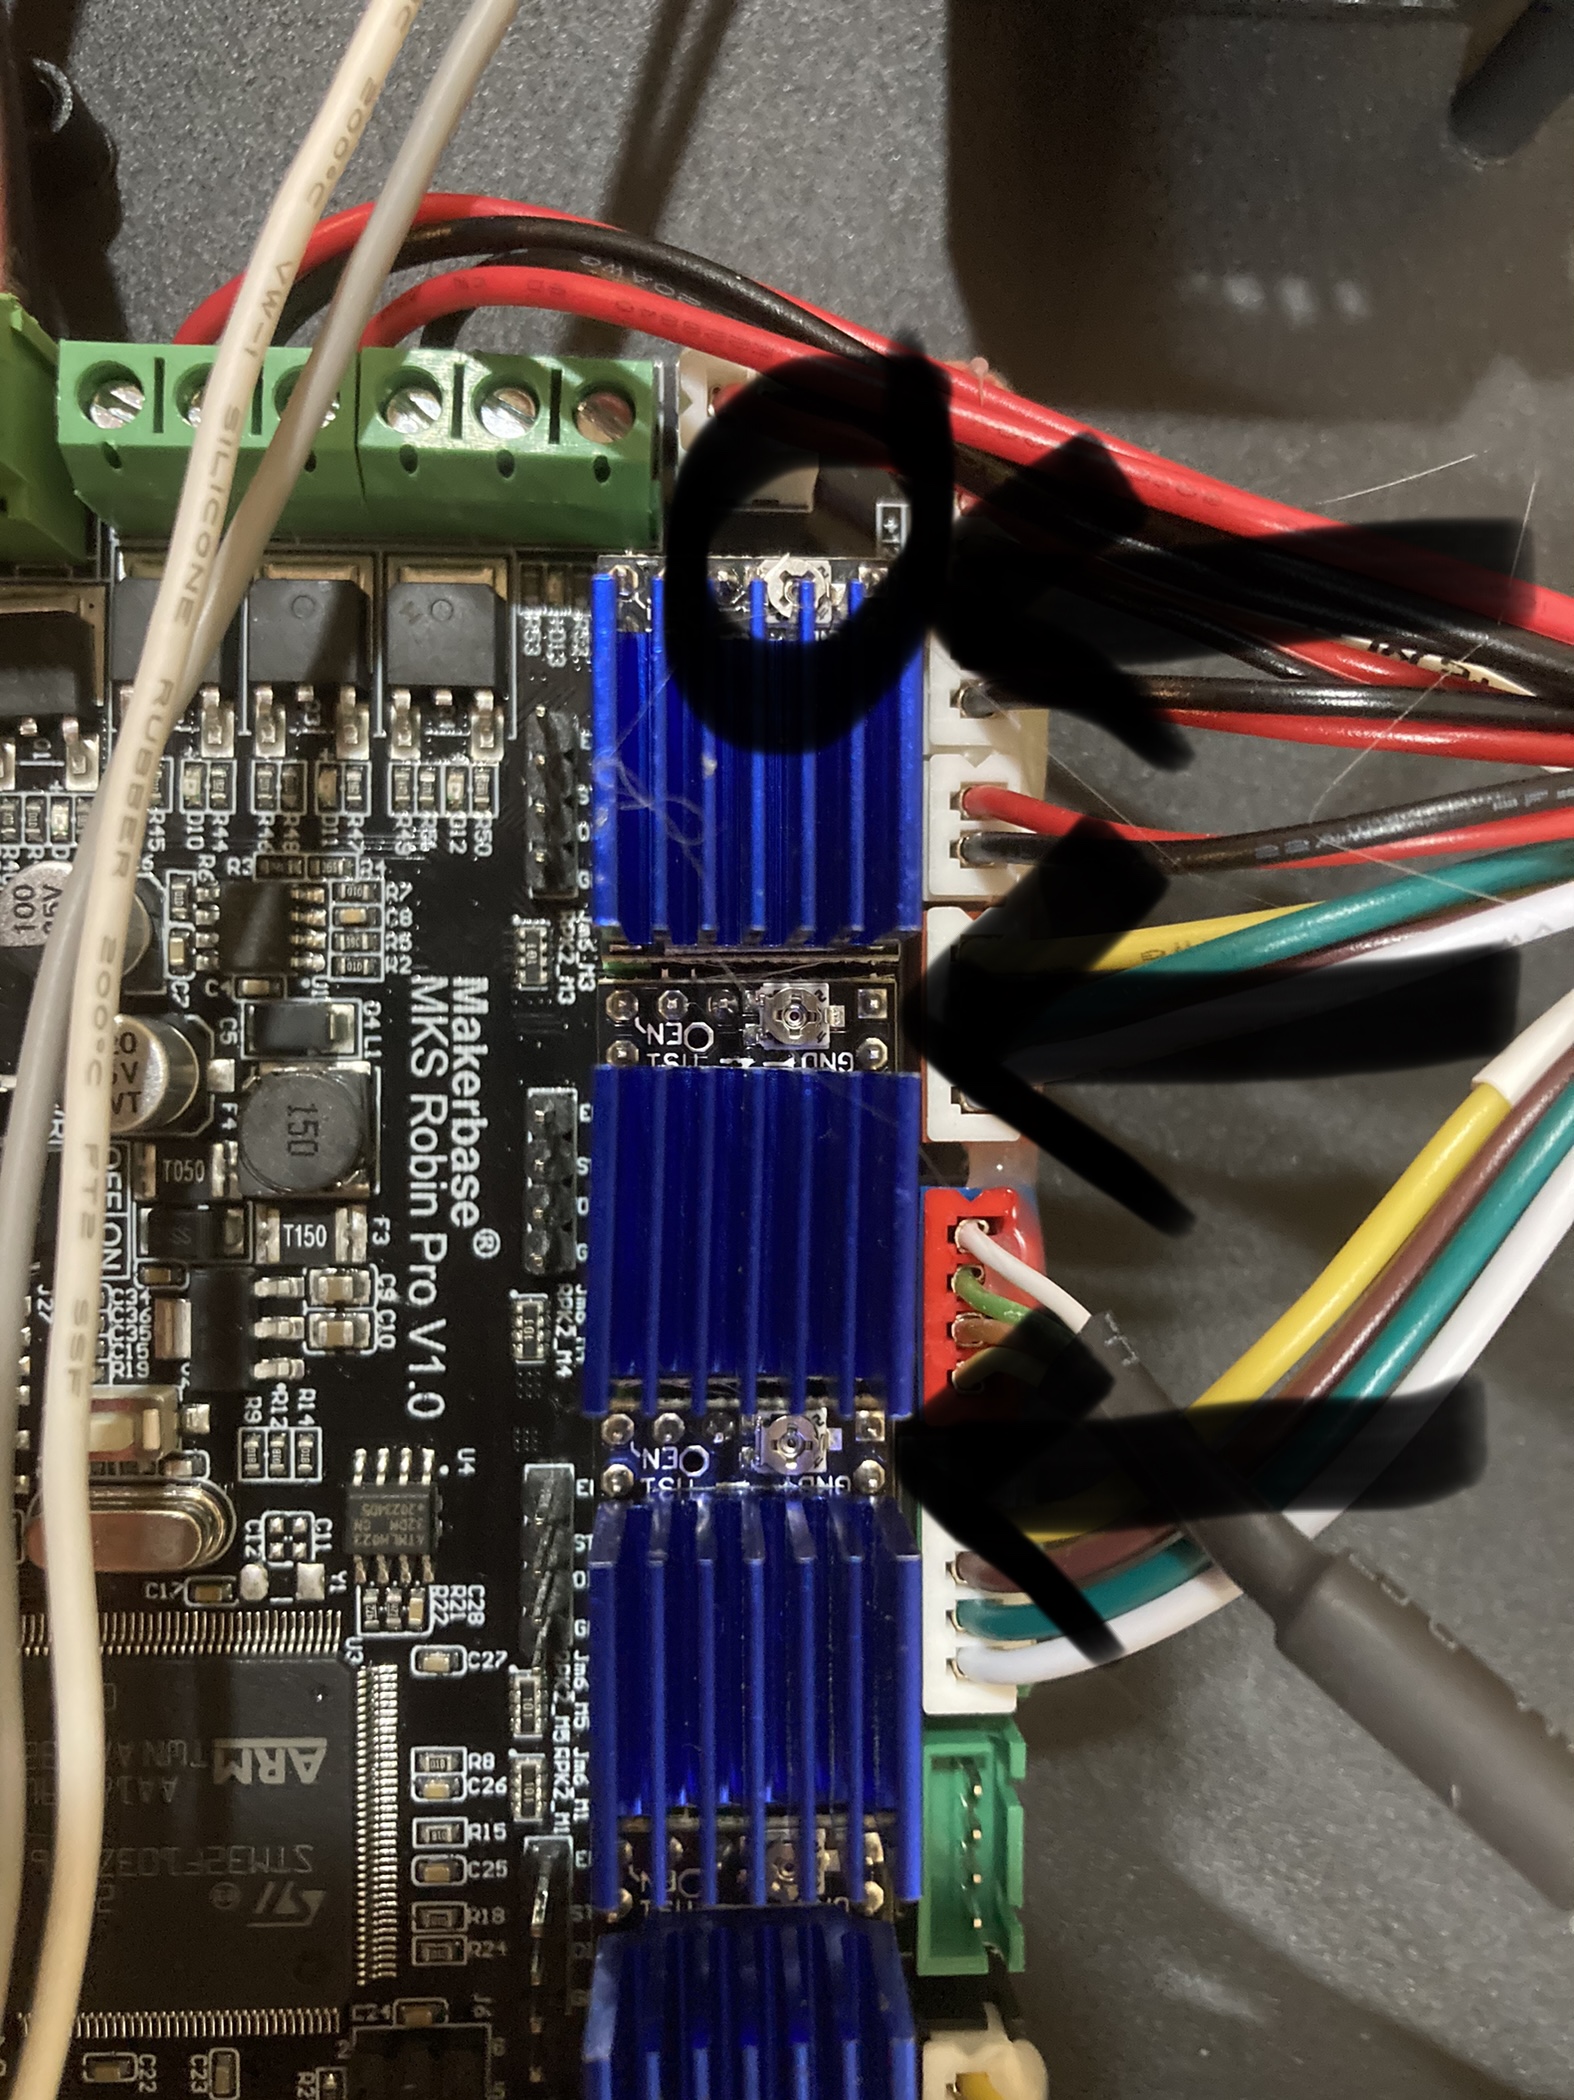
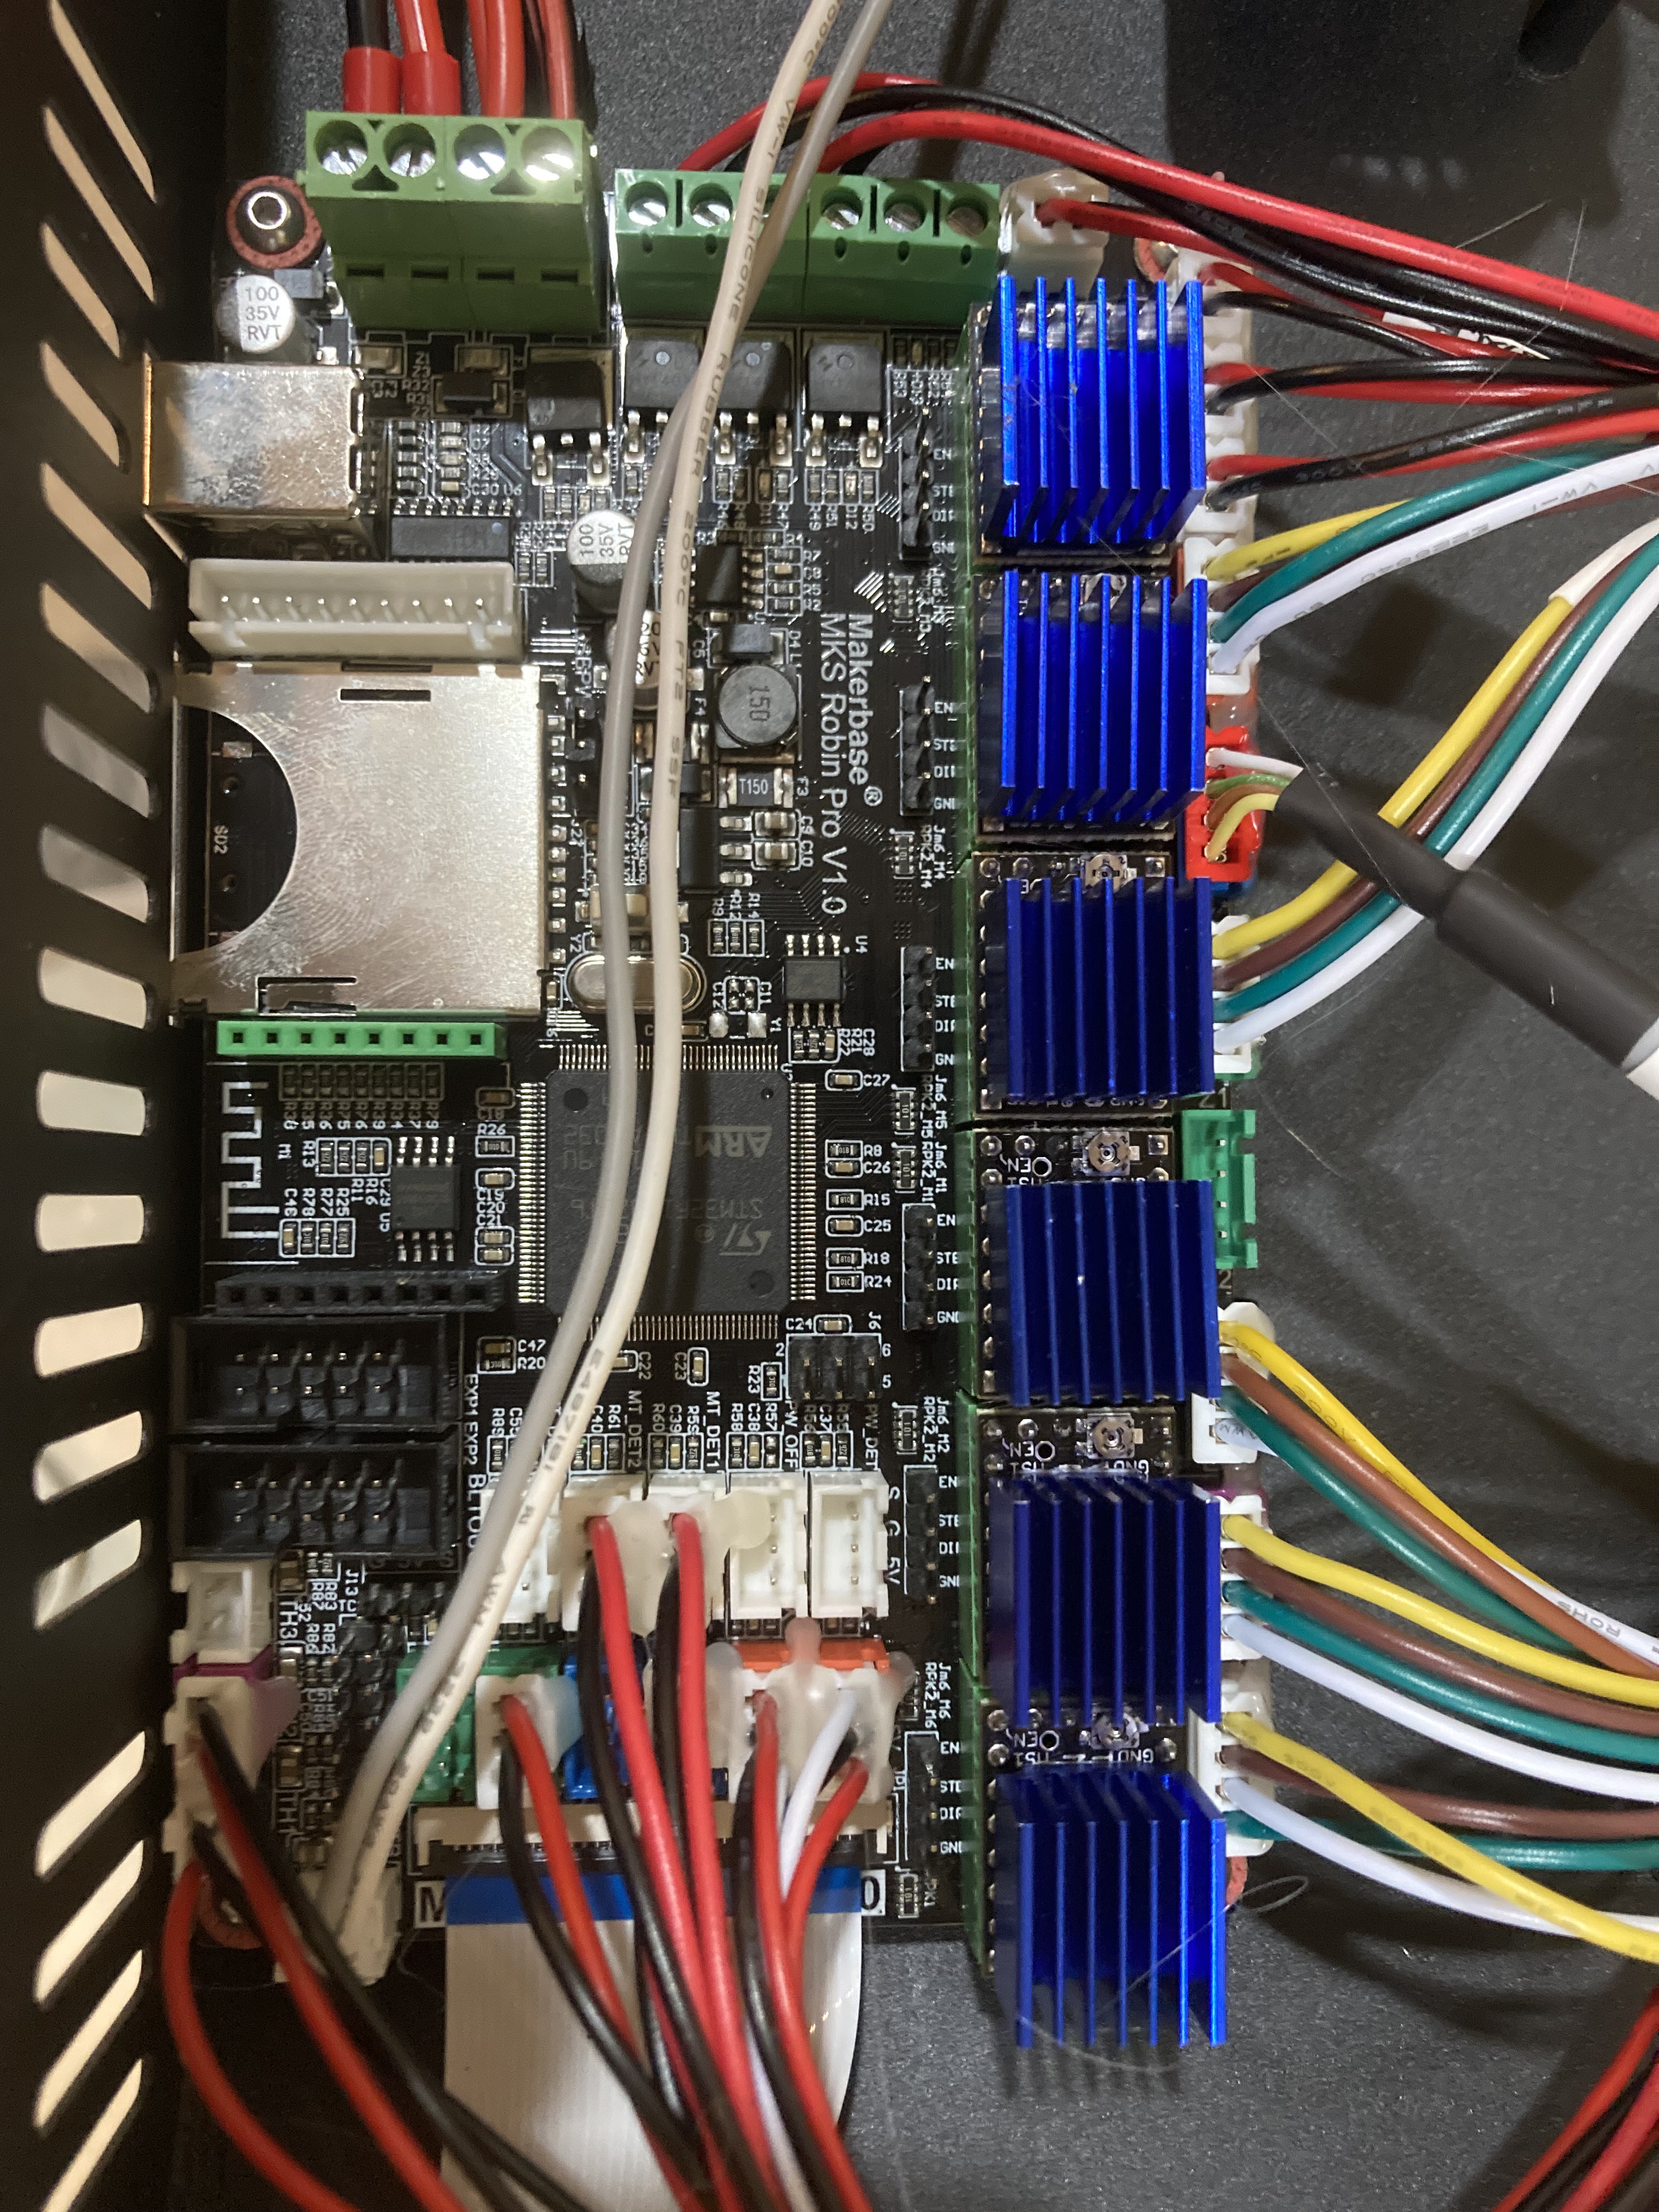
Search for ‘Vref’ in youtube and you’ll find a bazillion videos as a reference.
2. Take off old extruder and grab the circuit board from it.
This video is helpful just to understand how to take apart the extruder: https://www.youtube.com/watch?v=fIbvkzR5ew0&t=51s
While you’re at it… take off the cage.
3. Follow the Step 1 directions on the Drop Effect Site. https://www.dropeffect.com/omniadrop-assembly

When I initially assembled it, I did it incorrectly. The nozzle in this picture is flush with the Ring Heater. This should not be the case. There should be a gap between the nozzle and the Ring Heater. Screw the Ring Heater onto the Heatbreak on more turn so that there are no more threads visible on the heatbreak. This ensures that you tighten the nozzle against the heatbreak and that there is no gap between the nozzle and heatbreak. Otherwise the hotend could leak.
4. Plug Drop Effect into old JG Extruder circuit board.


You cannot plug them in the wrong way, since there is only one way to plug them in, this is due the JST XHP connectors architecture. They will only allow you to plug them in one way.
We’ll plug in the fans in the next step.
5. Follow Step 2. of the Drop Effect Assembly

The assembly may be mirrored from what is shown on the Drop Effect website since there is a right and left extruder. Also note that the fans have a slot on one side. Make sure to orient the fan so that the slot is blowing into the air duct for both the horizontal and vertical fan. There is an arrow that points to where that slot is located.
After putting on the fans you can plug them in.
The only thing you should look out for is that the part cooling fan and the hotend cooling fan are plugged in to the right connector. The easiest way to find out is to plug them in and see which fan turns on when you start the printer.
So the cooling fan that cools the aluminium heatsink should turn on, so the vertical fan. This fan ensures that the heatsink always stays cool when the hotend is heated up.
The horizontal fan is your part cooling fan. This fan is needed to cool your prints. This fan only turns on when you print something, because in your slicer you can set how much the fan cools your print. The part cooling fan is needed you print overhang and bridges and some material need more cooling than others.TPU needs a lot of cooling while PETG and PLA need a bit of cooling, ABS and ASA should not be cooled.

6. Mount on to JG Mounting block

7. Change the PID (tuning the heater)
Follow this video to correct the settings of the PID… https://www.youtube.com/watch?v=cl-B9SrlzMY
7. Calibrate the extrusion steps
Follow this article to make sure the extruder is extruding what you think it is:
17 Monday Jan 2022
Posted in Uncategorized
Tags

It is next to impossible to put either gloves or mittens on John’s hands. And even if I could manage that feat, it’s doubtful that he would then be able to control his joystick.
But in the wintertime, man, when the wind blows, his hands get cold. So, a new attempt at combating the cold.
So, introducing the handwarmer pouch. Slip a handwarmer into the pouch and then slide the whole thing around John’s hand.
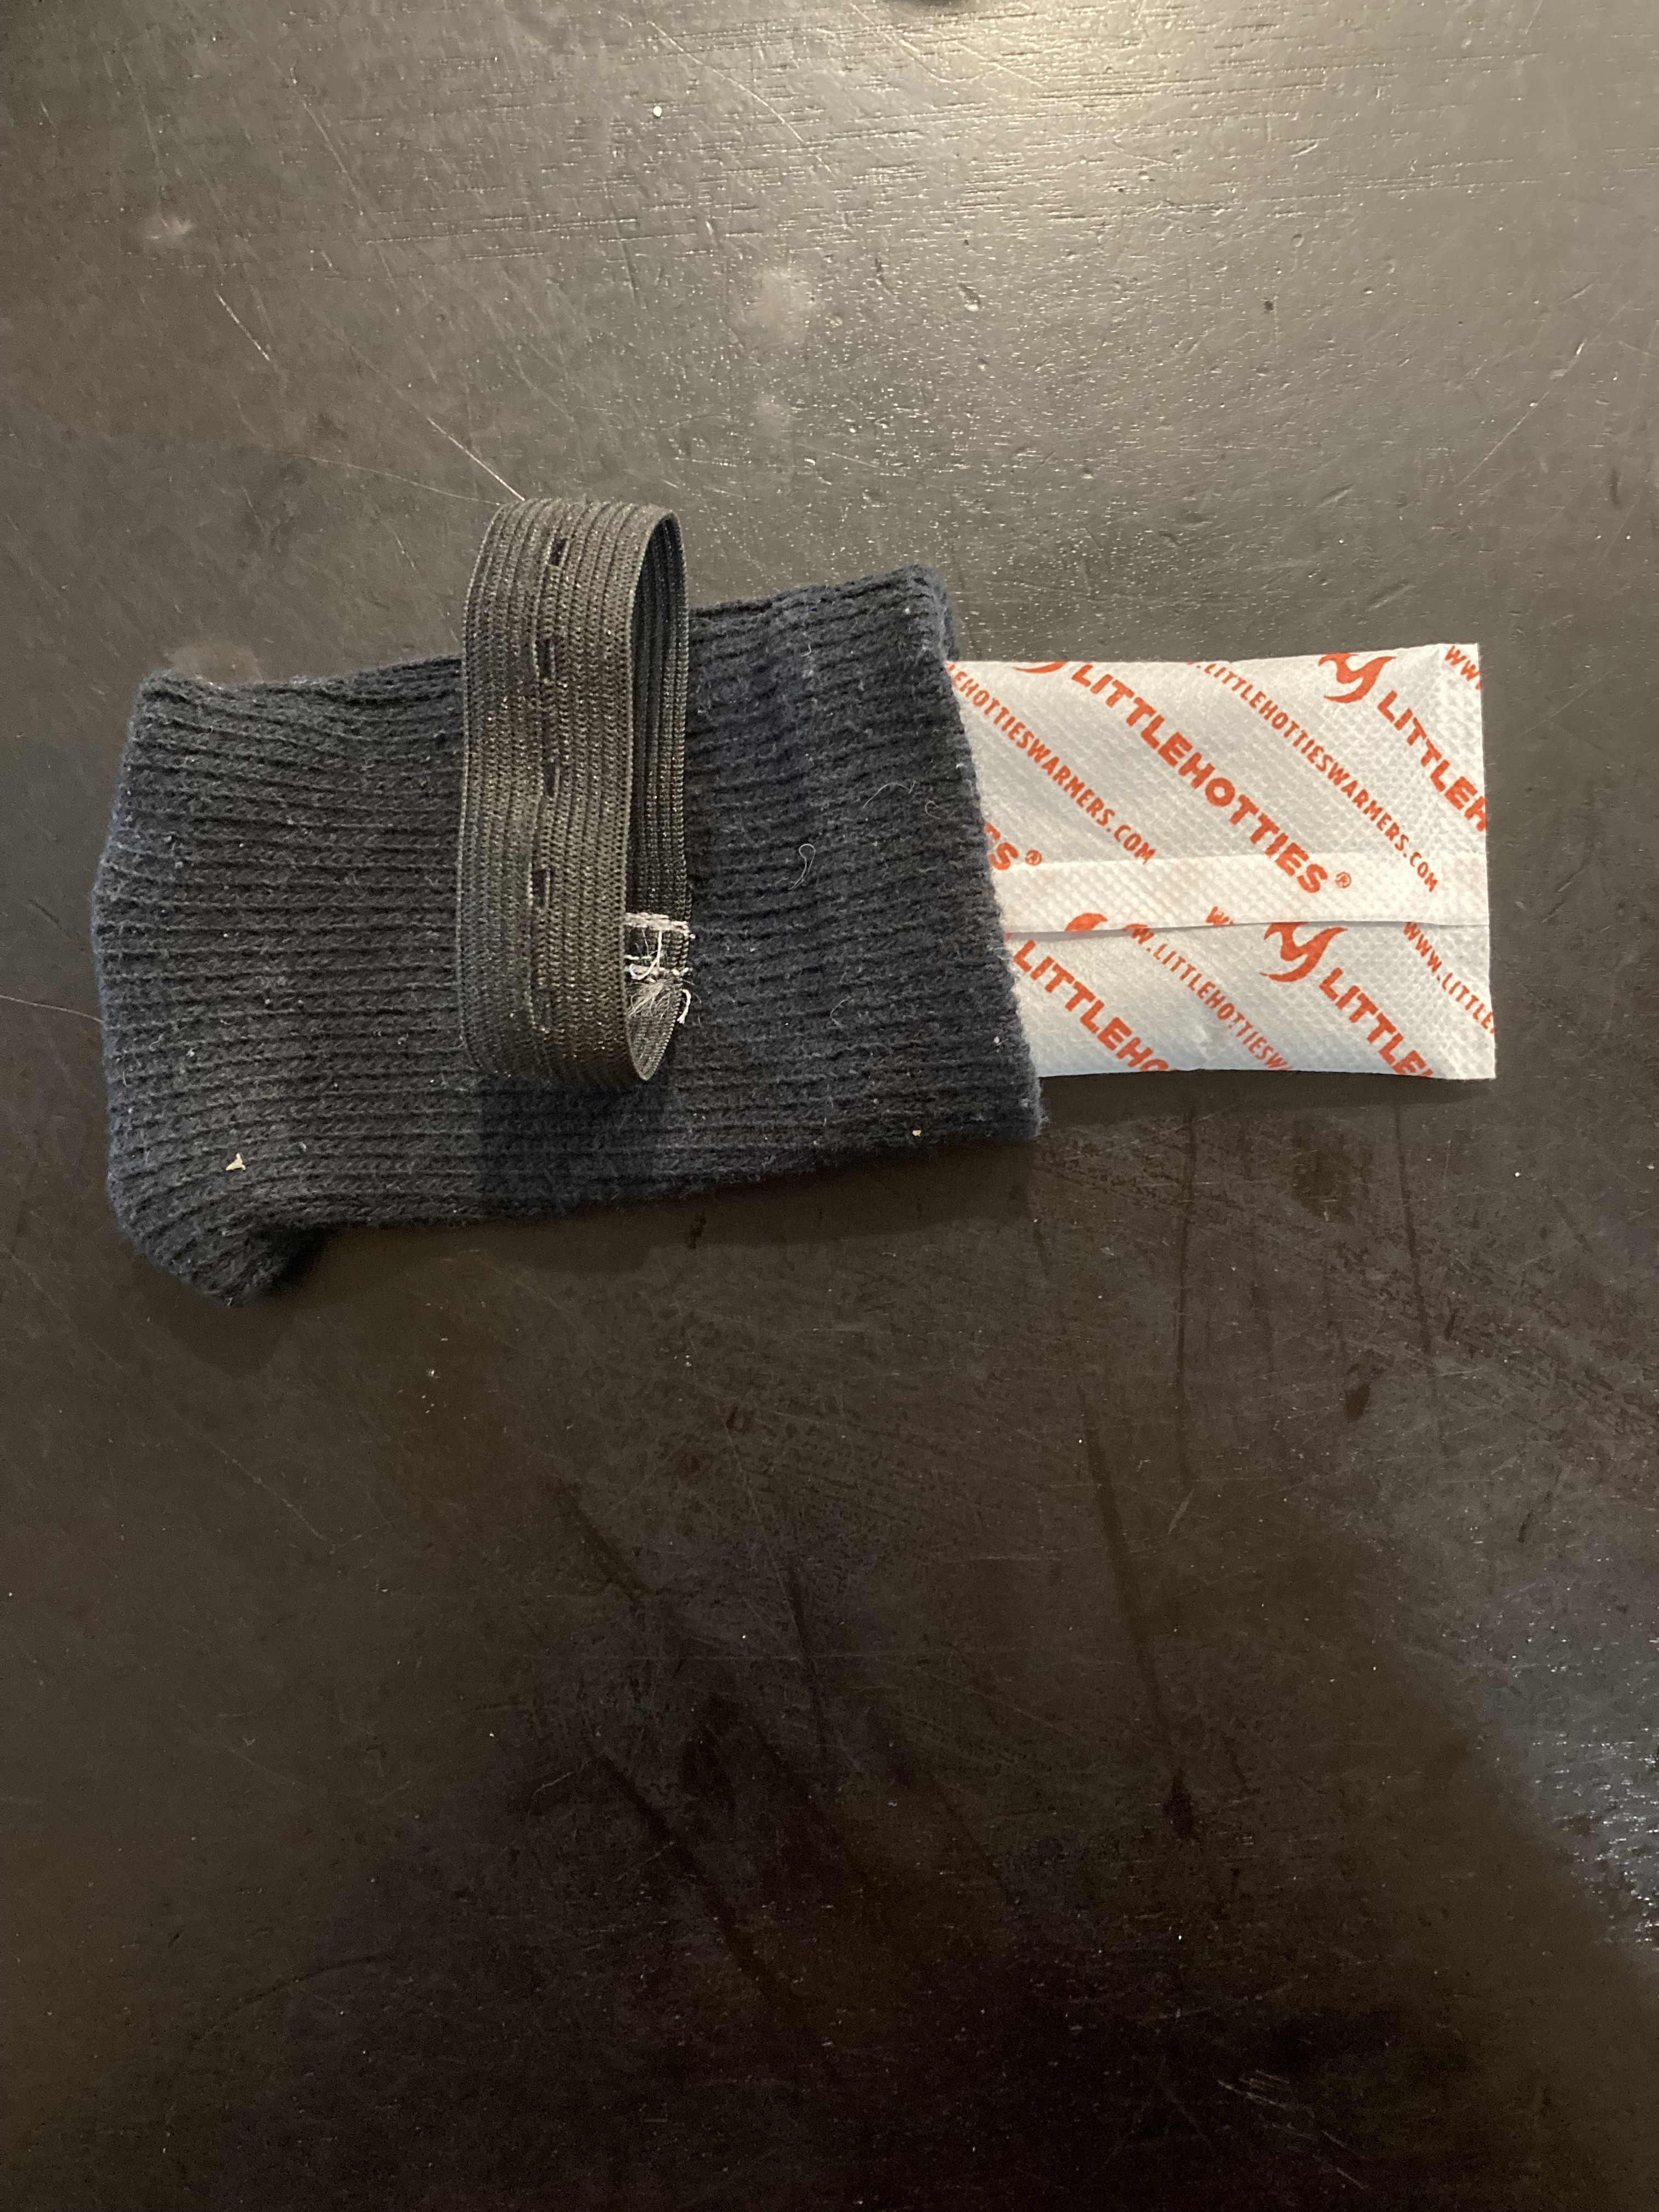
I made one for each hand. We’ll see how well they work. It’s probably self-explanatory how I made it, but for more details, go to my gluckc instructables site.
https://www.instructables.com/Hand-Warmer-for-Wheelchair-User/
06 Friday Dec 2019
Posted in Uncategorized

This was a pretty simple project to try to attach a tray to John’s wheelchair. For details go to instructables
This is handy now to have the capability to 3D print any type of bracket I want to be able to connect to the wheelchair.
03 Thursday Oct 2019
Posted in Uncategorized

I am revisiting controlling the elevator with an Alexa command. This version is clean, (relatively) easy, and works well. The secret is using a relay with a microprocessor and connecting directly to the button.
For details, go to instructables.
30 Friday Aug 2019
Posted in Uncategorized

So recently we took a trip cross country for John’s Make-A-Wish. We were very nervous about flying since we read that nearly 2,000 wheelchairs were damaged over a 3 month period!!! (See this article)
So, we tried to come up with a solution we felt comfortable with to protect the wheelchair. Here is what we did…

A — We have a Permobil. Along the side of the seat is a rail that you can attach to. Just slide a nut into the rail and you can screw a bolt into the nut. As you can see in the picture, we attached an L-bracket to the rail. (Note, the holes in the L-bracket didn’t line up with the rail, so we had to drill a hole through the L-bracket.) So, we attached 2 L-brackets front and back and then we attached a 2×4 onto the two L-brackets.
B — We used bungy cords to keep the footrests in an upright position.
C — The cable to the joystick didn’t easily unplug. So what we did was pull the joystick off the armrest and put it inside a shoebox. We put bubble wrap all around the joystick. Then we used the seatbelt to hold it in place.
D — Here’s where the magic happens. We went to a place that makes iron railings and asked them to bend two bars for us. They also cut a straight piece for us to join the rods together. We bolted the bars onto the 2×4’s. We figured these would act as roll bars to help protect the wheelchair.
E — On the permobil, you can lift off the seat back easily. We lifted it off and took it into the plane with us. Then in our case, the wheelchair couldn’t be higher than 33″, so we tilted the back until it fit the regulations.
F — We also took off the seat cushion and brought it into the plane with us.
After we got everything in place, we put a cover over the whole thing to protect it from weather. (I just made the cover out of garbage bags that I duct-taped into the right size and shape.)

As far as procedure goes… John stayed in his wheelchair until we got to the gate. We carried everything we needed to work on the wheelchair. So, we had to send the wood, the metal bars, tools, nuts/bolts through security which was interesting. When we explained what it was for they let us through.
At the gate, we sat John in another chair and worked on taking the wheelchair apart. We definitely had to leave ample time to check in, get through security, and take the wheelchair apart. We had instructions on the chair for common things they asked about — battery type, weight, and how to unlock/lock the wheels. We talked with a technician about how to move the wheelchair and they took it away to load it on the plane. I think they liked the way we packaged the wheelchair because they felt it was safer and they didn’t have to worry about not damaging it.
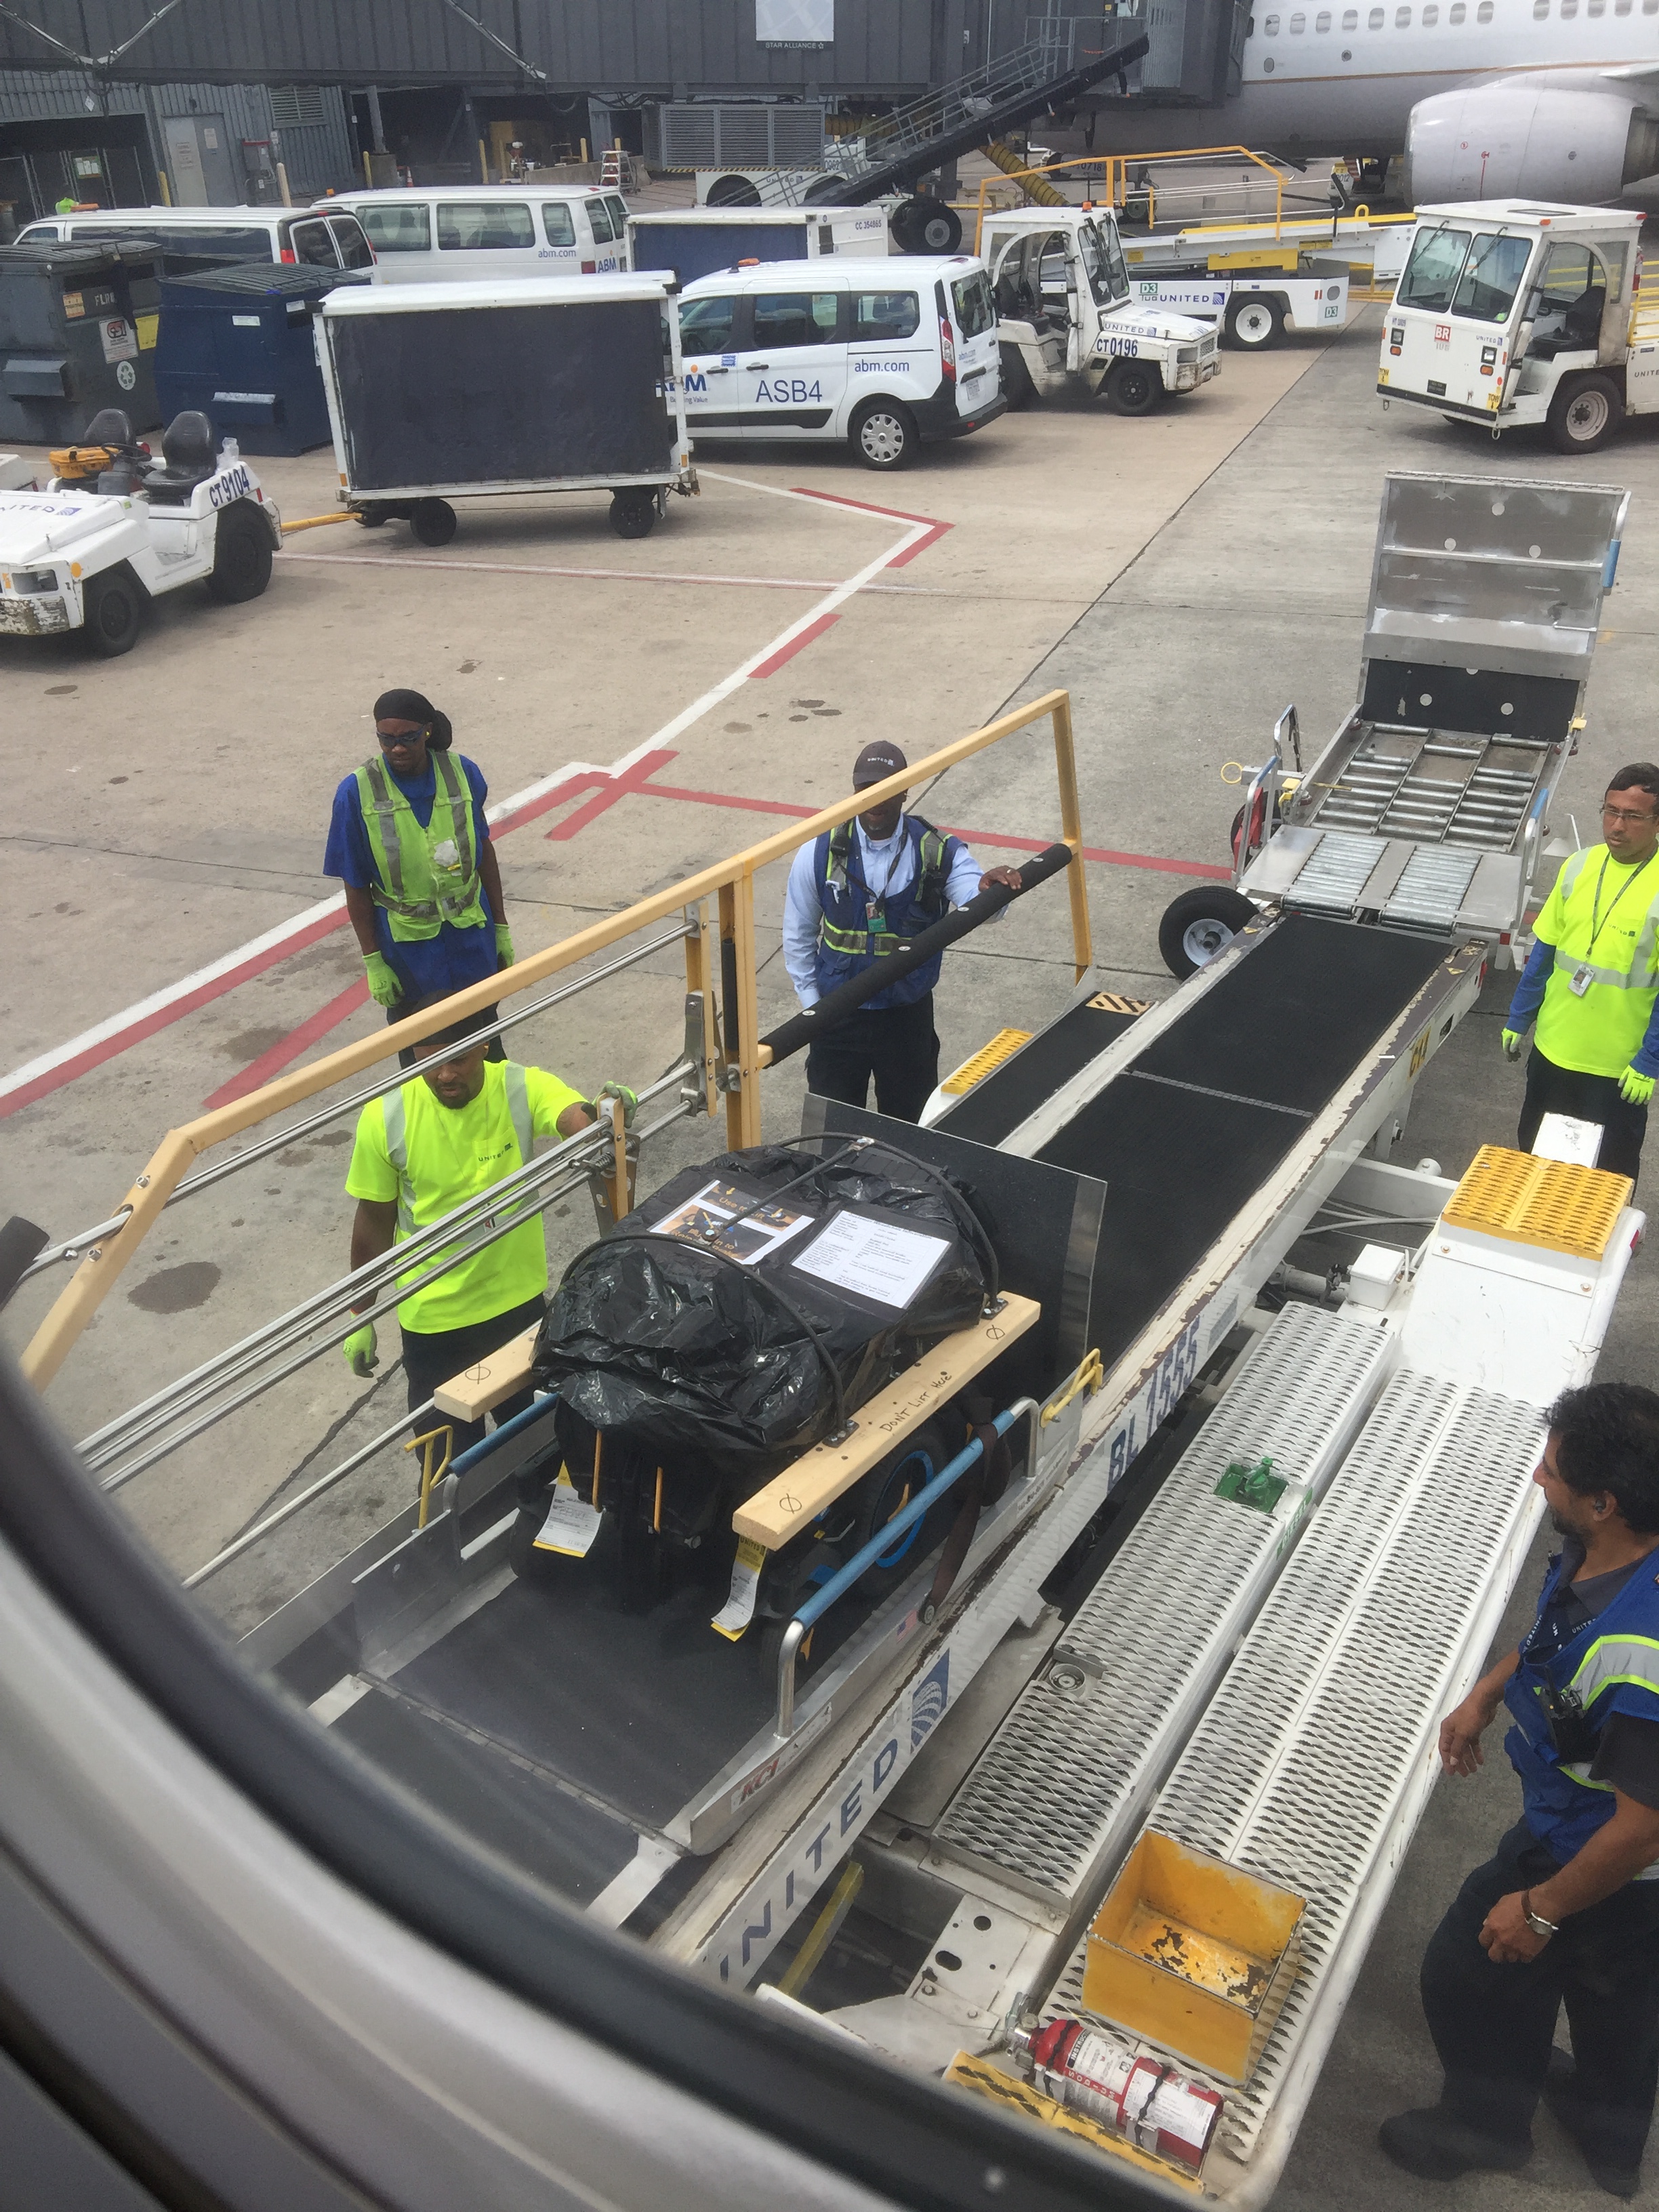
All in all, we are very pleased. We traveled across the country and back and there was no damage to the wheelchair — which was the plan !!
23 Tuesday Jul 2019
Posted in Uncategorized
This past winter John’s back began hurting. Every time we would lift him it would hurt. I could no longer transfer him myself from his bed or bath chair to his wheelchair. I had to start using a lift. I also could not lift him over my leg anymore to pull up his pants. Getting dressed and going to the bathroom became a much longer task. I had to use a lift to go from wheelchair to bed. From the bed, I had to roll him back and forth while pulling down his pants. Then use the lift to go from bed to bath chair. After he used the toilet, I reversed the process to get back in the wheelchair. His school didn’t have the resources set up to be able to handle this change, so for several months, we were picking him up from school and taking him home whenever he had to go to the bathroom.
I found a friend, Terry, who sews and initially asked if she could put a long zipper in some pants with an elastic waist that we already owned with the thought that we could try to use a urinal instead of transferring out of the chair every time. It didn’t work as well as we hoped. There just wasn’t enough space to maneuver. We went back and forth playing around with different ideas until we discovered the benefits of having a separating zipper down each side of the pants.
Our life changed dramatically! For real. We can now open up the pants and sit them on the wheelchair. We can use the lift to sit John on the pants. Then we just zip the pants up. Amazing. We don’t have to lie him on the bed and flip him from side to side while trying to yank up the pants. And I’m sure this is much safer than when I used to lift him up and rest him over my leg while I pulled his pants up. This has been such a timesaver for school. He doesn’t need to transfer over to a toilet since he has plenty of access to use a urinal. This has been such a help for when we are away from home, too. Even if we have to transfer to a toilet, we still don’t have to worry about pulling pants up and down. Because we worked from scratch we were able to add in a couple additional features. The back of the pants are higher than the front. It was hard to find pants that covered all of John’s behind. I don’t know if it’s his body shape, or if it’s just because he’s always in a sitting position, but these pants cover everything they need to J Also, it was helpful to make the pants lower in the front. We found this to be more comfortable for him and it stays clear of his G-tube.
Visit instructables ( zipper pants ) for directions on how to make these pants. There are two sections. One for getting the pattern in the correct size and one for sewing the pants together once you have the pattern. Thank you to Terry for providing the instructions on how to sew the pants together!! I recognize that not everybody can simply run a python script to get a pattern, so if you are interested in making the pants, but don’t know how to run python, contact me and I can run the script and send a PDF of the pattern to you. After that, if you don’t know how to sew, hopefully with the instructions and the pattern you can hire someone to make them for you.
17 Thursday Jan 2019
Posted in Uncategorized

Continuing in the quest to keep John warm, I made this carbon fiber heated cloth. I have found it difficult to modify a warm coat that I can actually put on him due to contractures in his elbows. I do have a coat I can get on, but it’s not that warm. (Actually I also have a warm coat – but it’s sooo puffy that he can barely drive the wheelchair.) So, the idea is to put this liner on first, then put on the jacket. It is heated using a lithium battery that is used for power tools.
After I made it, I tested it out on myself while taking the dog out for walks in 36 degree weather. Ahh! toasty warm. It sucks the battery up pretty quickly, though. I’m thinking I’ll just keep a couple in his backpack and switch them out if we’re out for long periods (which isn’t often).
Today instead of putting it over his head, I laid it on his wheelchair seat before putting him in it. He had a nice and toasty bum — kind of similar to a heated car seat.
For details on how to make it : https://www.instructables.com/id/Carbon-Fiber-Heated-Liner/
