
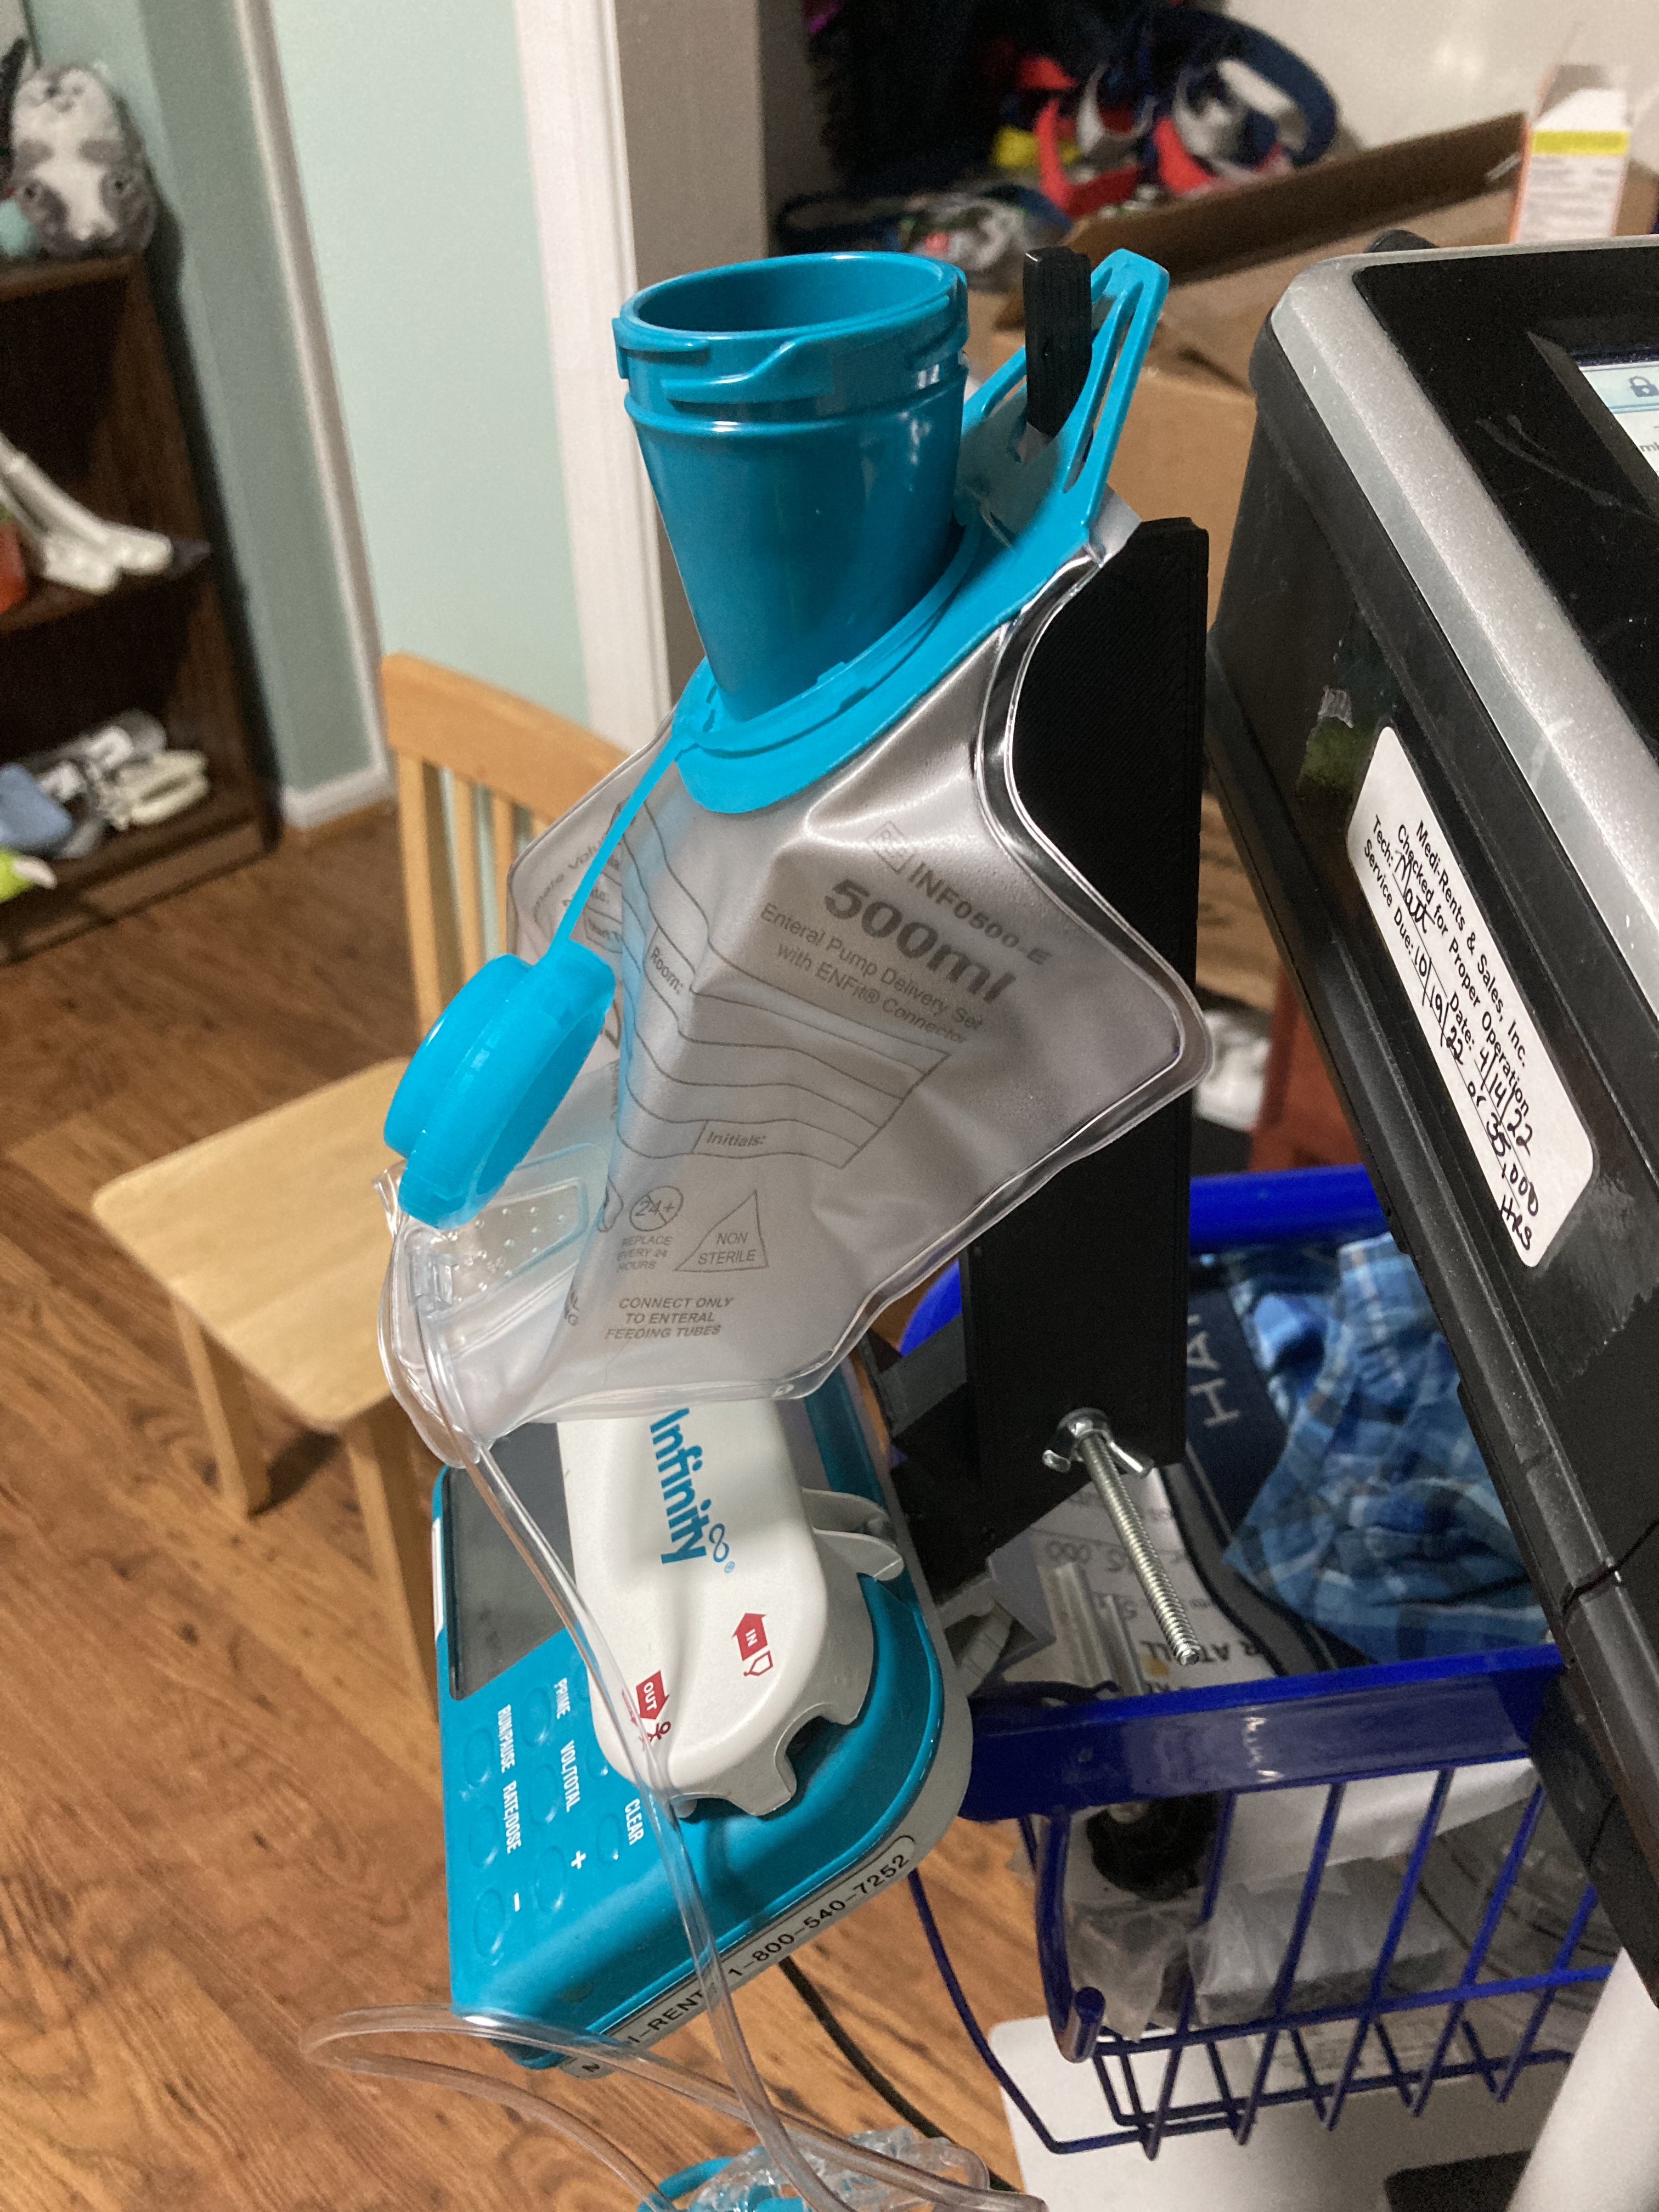
Here’s an example of the kind of things I 3D print. We don’t have a specific feeding machine stand, so we never had a good place to hang the feeding bag, so here was my thought process as I came up for a design to print…
- Wanted it to be portable – ie, when traveling still want to be able to use it.
- Bag had to be hang above feeding machine
- Did not want to have to clip it on
- Had to fit in the current space where the feeding machine is
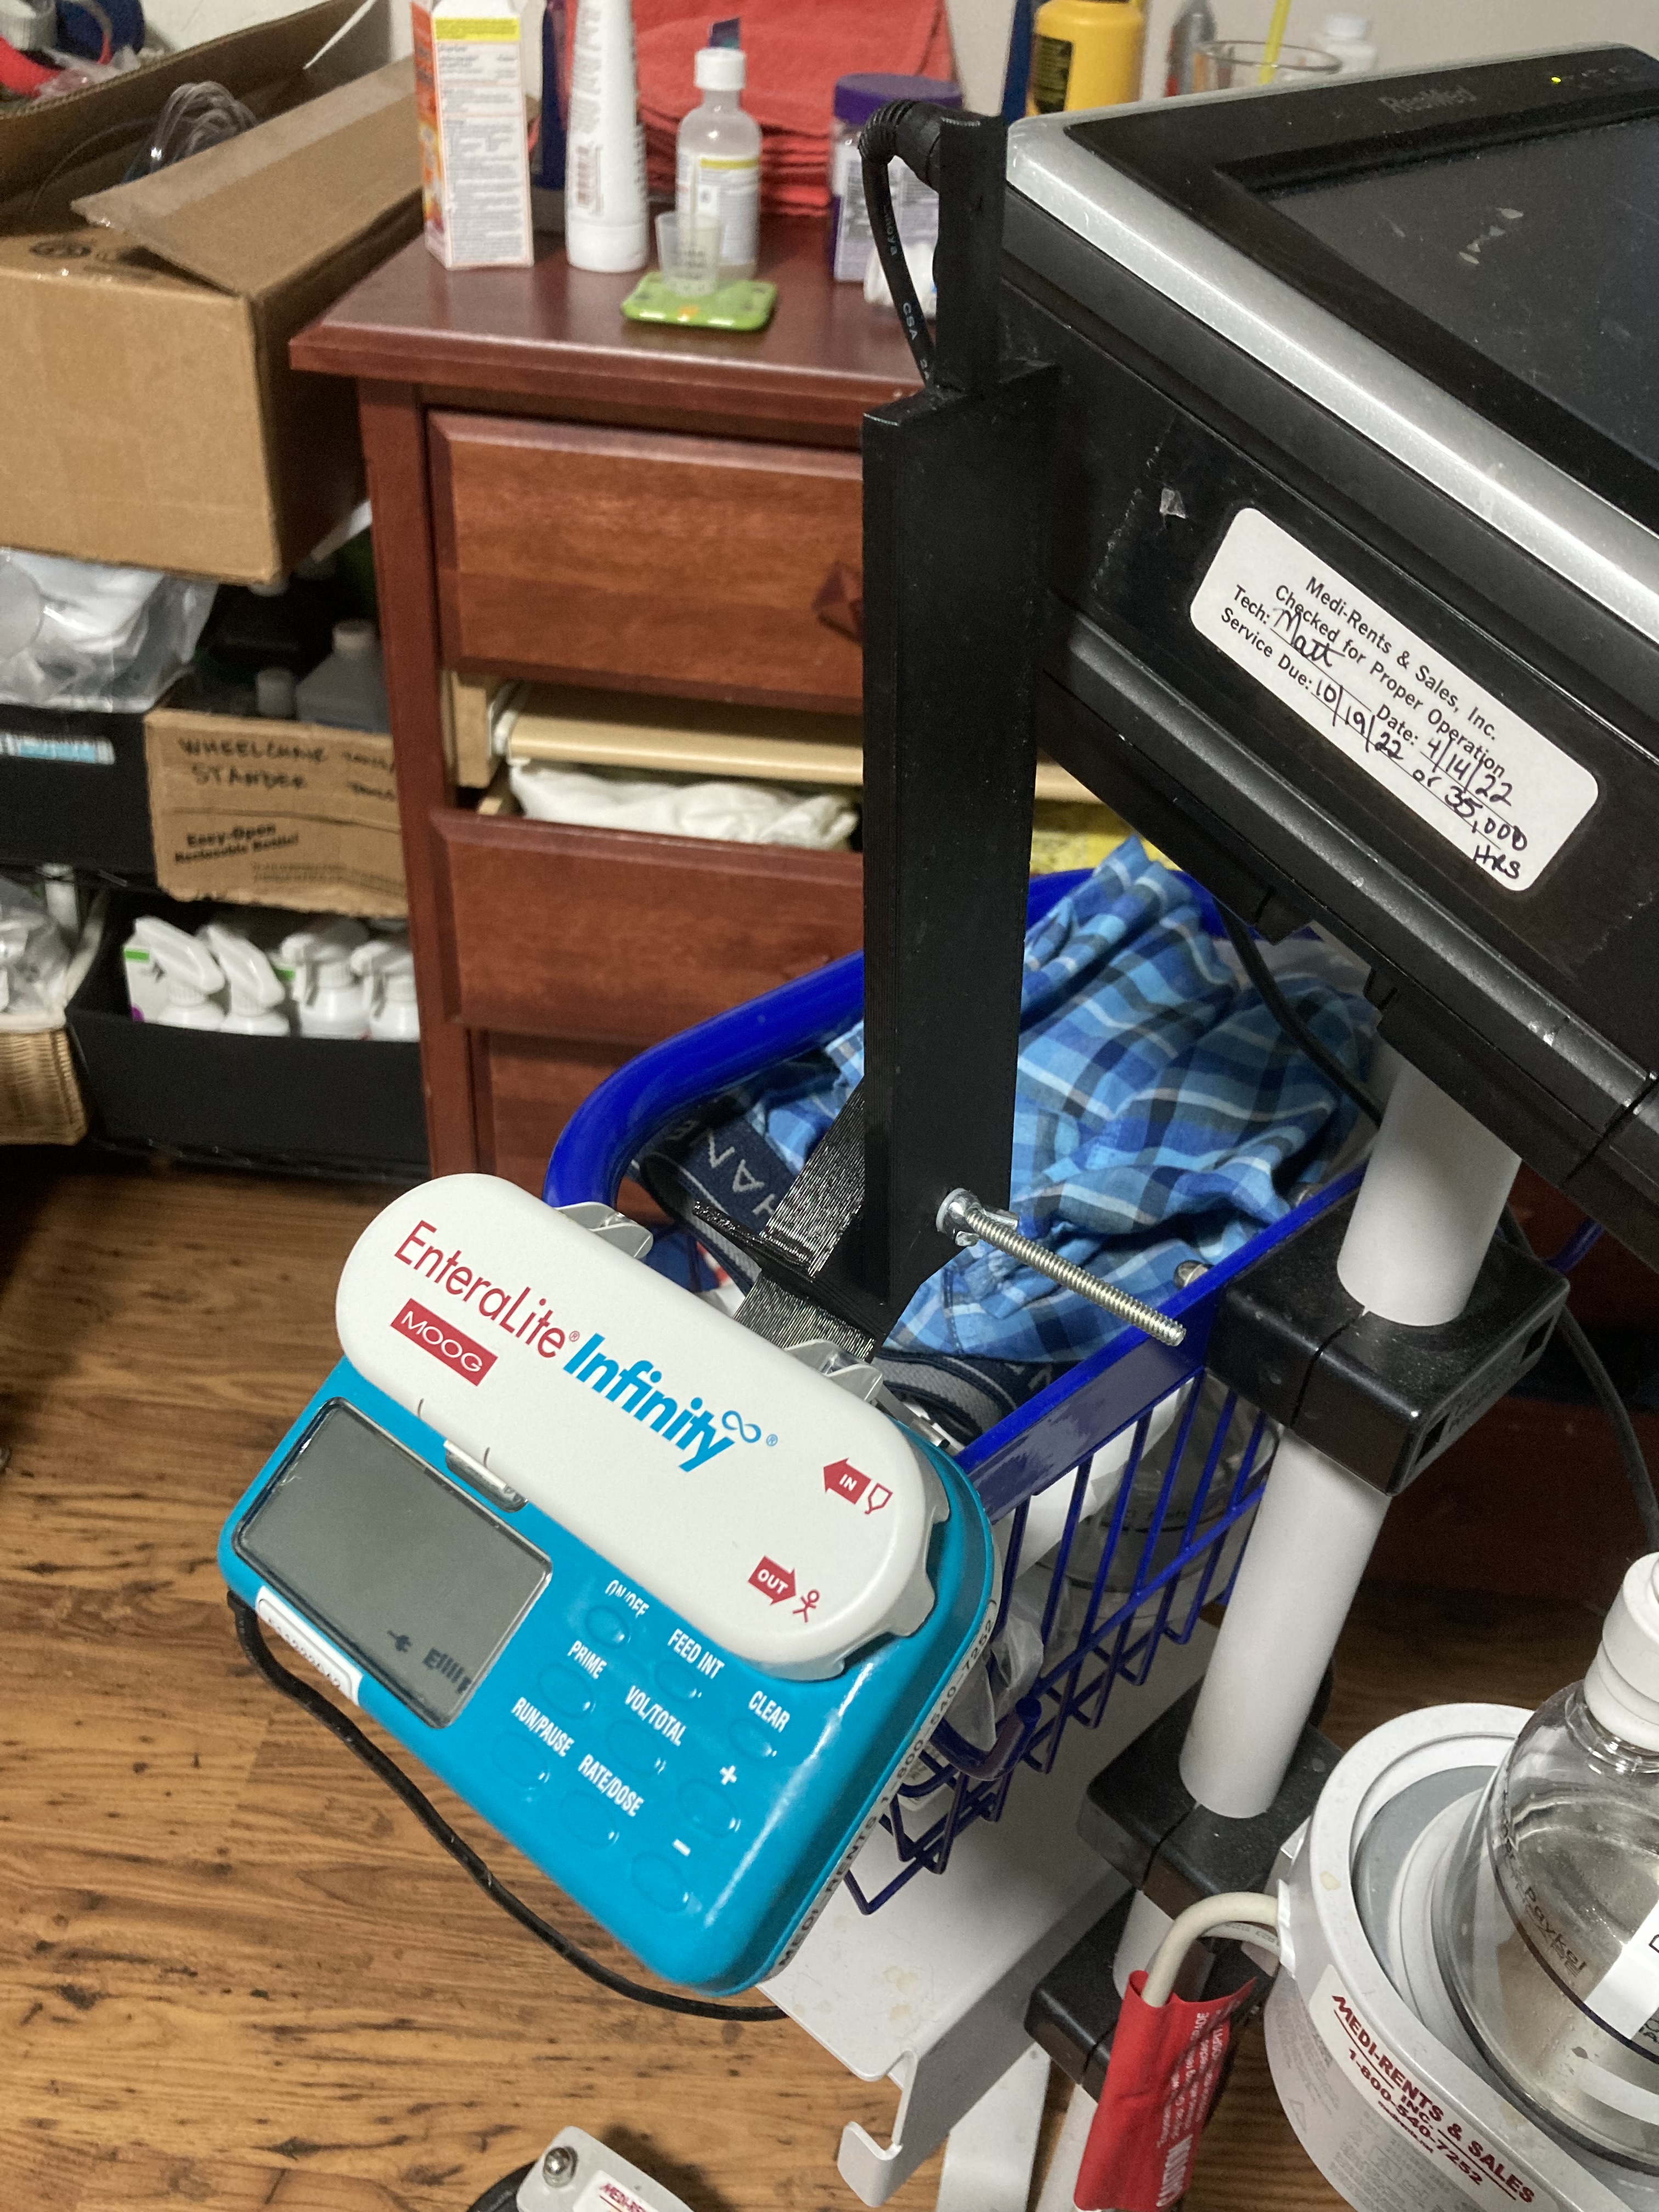
Below is the finished product. There are two pieces. The bottom piece is bolted directly into the feeding machine. (The feeding machine already allows you to screw in a clamp and this is where I have my base piece screw into, too). This means that it is portable. Wherever we take the feeding machine – the feeding bag hanger goes with it.
The upper piece bolts into the bottom piece – and I used a wing nut so that you can tighten or loosen the connection in order to get the angle of the hanger where you need it.
Below is a better view showing how my 3D printed piece squeezes between the clamp that comes with the machine, and the machine itself. It had to be printed thin enough so that the clamp bolt was still able to screw into the back of the machine.
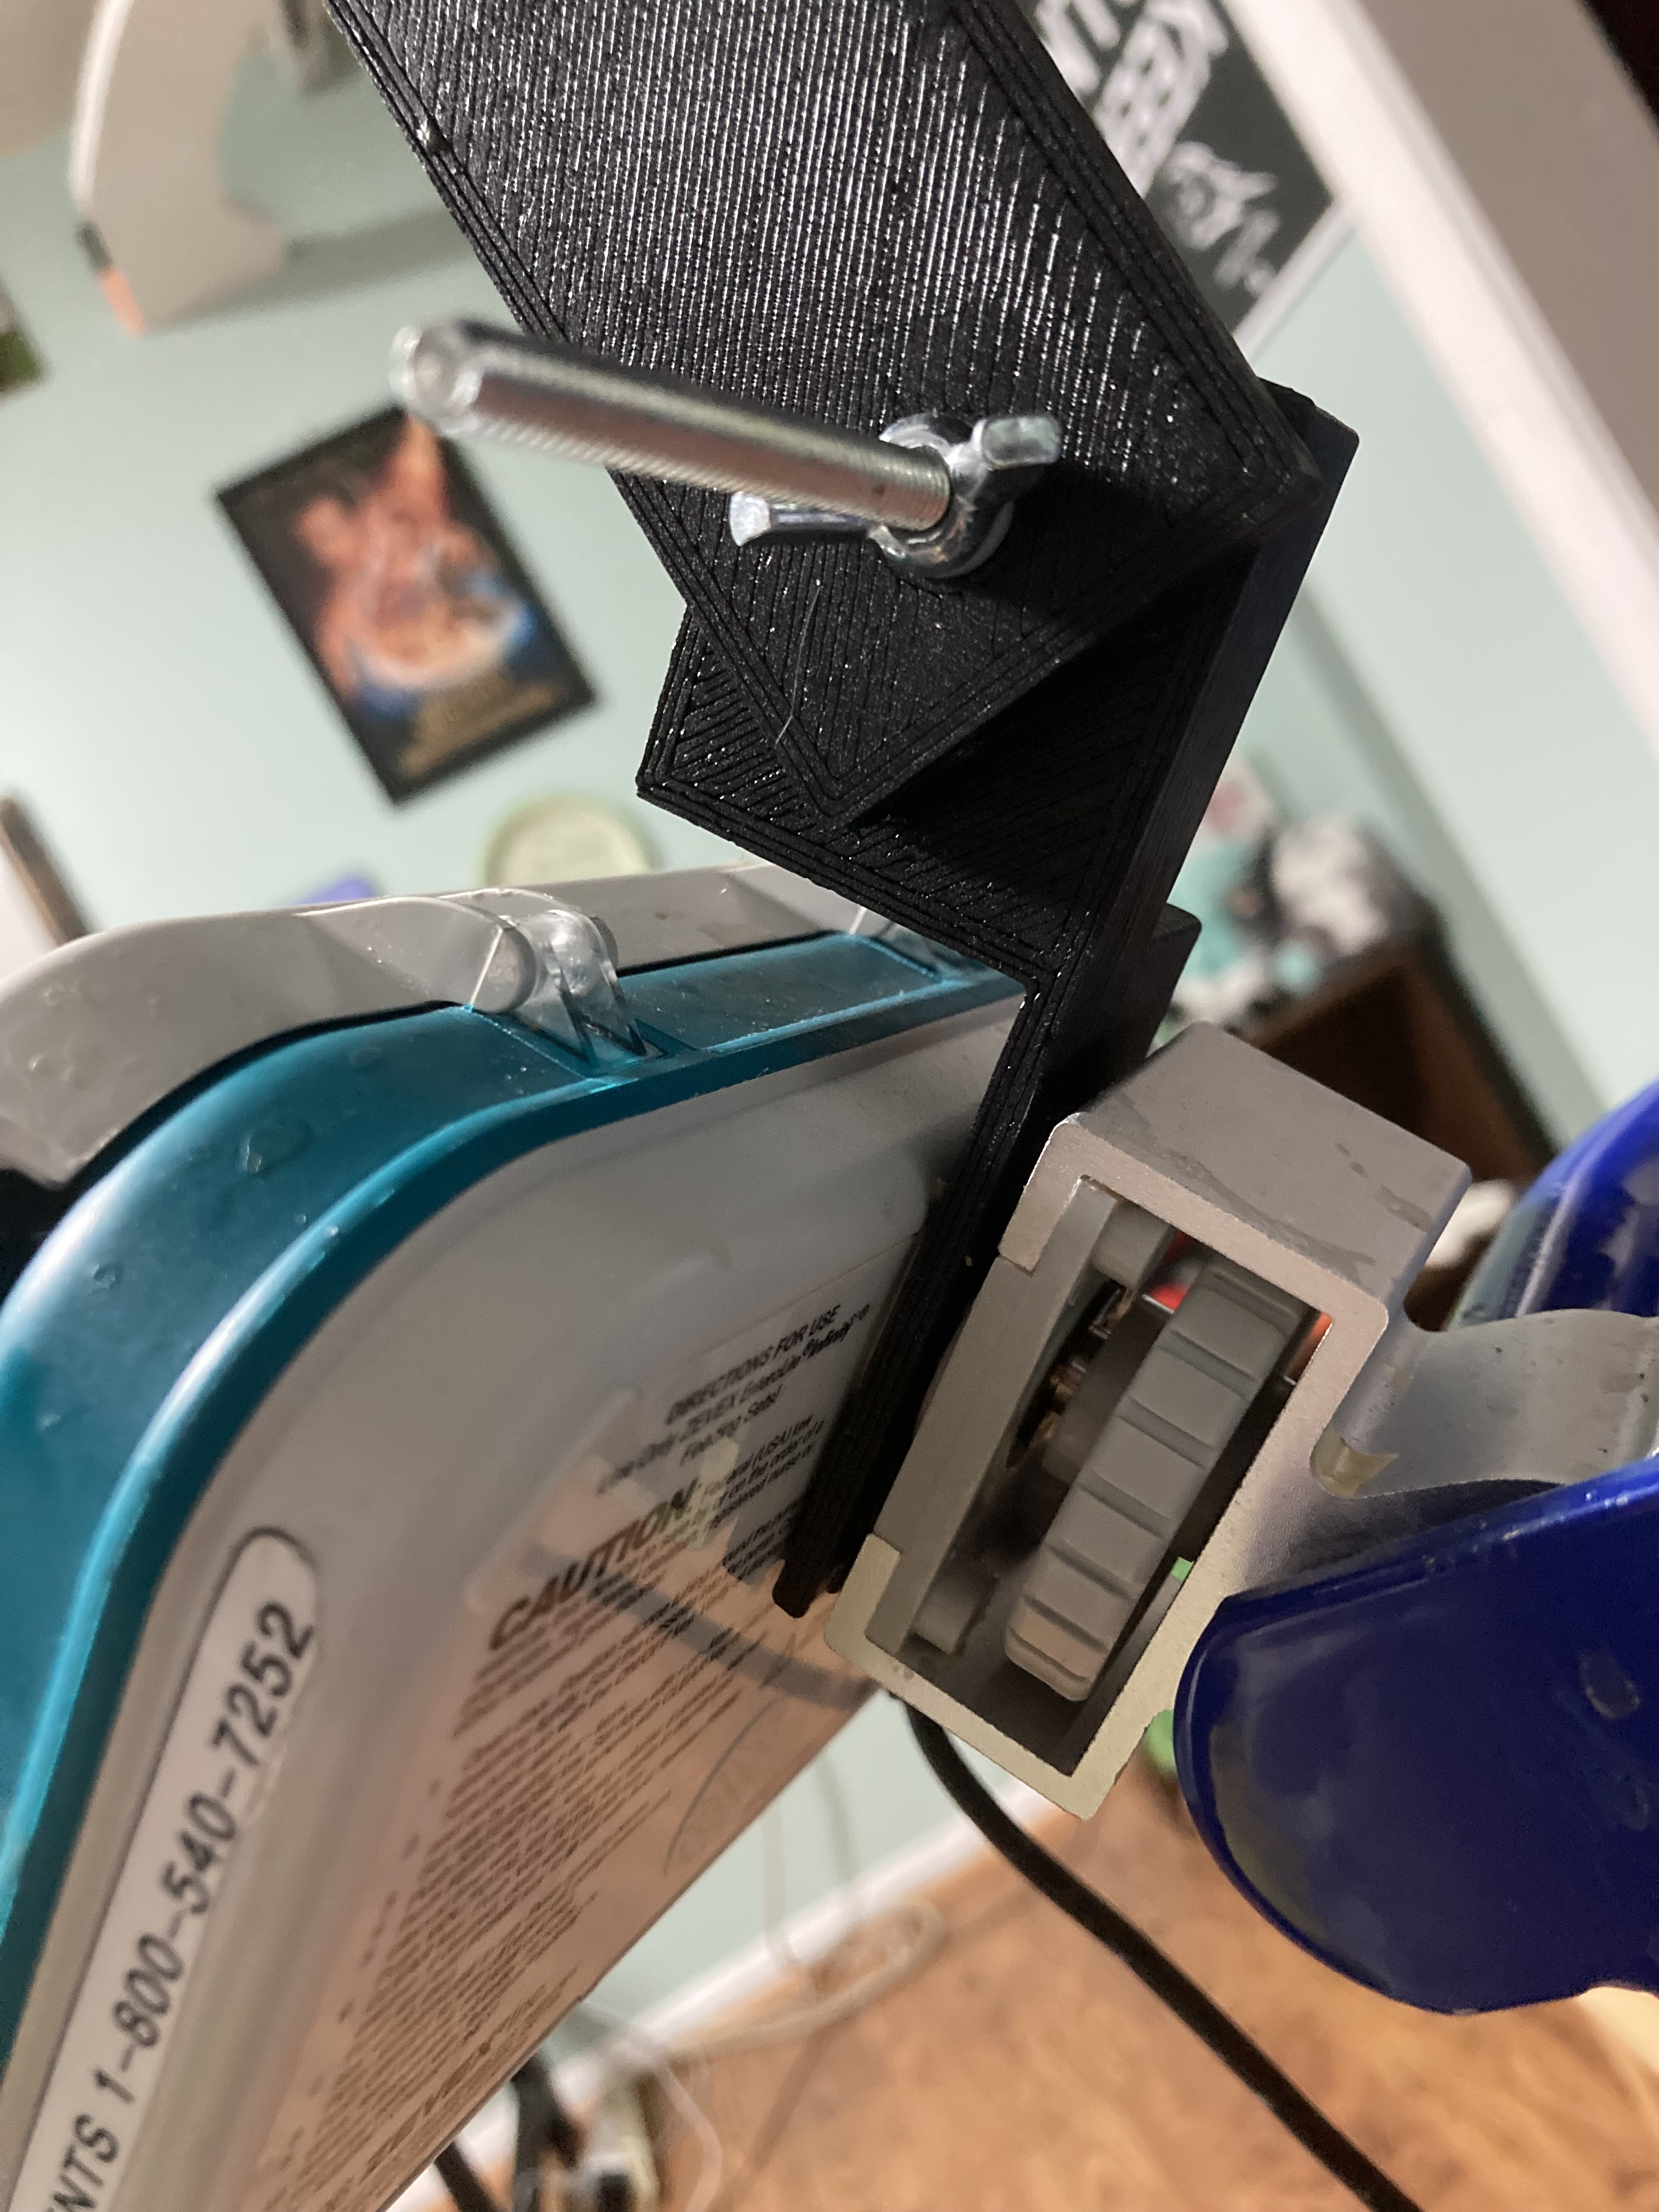
Note that this design works well enough – but if I wanted perfection, I would have re-done it. Note in the above picture that when you open the front of the feeding machine – it will only open so far. It opens far enough, but just barely. If I re-printed it, I would leave more room for opening it. I’d also probably play with the connection where the wing nut is – so that maybe the stand clicked and held without having to tighten the wingnut so tight. But this is being picky.
I used TinkerCAD to design the bracket. The bracket was saved in two STL files. See the image below.

I used IdeaMaker to generate GCode from the STL files for my JGMaker 3D Printer and bada-bing bada-boom I now have a place to hang the feeding bag.
